How To Hang A Porch Swing
HOW TO HANG A BED SWING OR PORCH SWING

While there are many different ways in which you could go about hanging your swing, there are a few things that remain consistent. You need to have the structure to hang it, you need materials or hardware to hang it, and you need to be able to accomplish hanging it in a safe manner. Follow our step-by-step guide to hanging your porch swing or bed swing!
STEP 1: ESTABLISH WHERE YOU WANT TO HANG THE SWING
Whether you want to hang your swing under your back porch or from a large live oak, you need to know your plan for how the swing should be hung and whether it is structurally strong enough to do so. In the event of wanting to hang it from a tree, there is no science to knowing whether it is strong enough. So in this case, make sure the branch is alive and is big enough to support the weight of the swing you are hanging. If you are hanging your swing from a porch, you want to make sure it is being attached from the joists of your ceiling or any structural beams if they are present. In some cases, you may not have joints or beams in the position you want the swing. In this case, a handyman or framer can put a 2x6 or other structural piece of lumber in the necessary place for you to hang your swing.

STEP 2: SET YOUR HARDWARE
Once you have established the location of your porch ceiling joists and where you want your swing in relation to them, it is time to set the hardware that your swing will attach to. For the swings we sell here at The Corbel, we use an eye bolt (also referred to as a lag bolt) and a shackle to attach the swing. Both of those are pictured below. Whether you have a swing from The Corbel or not, most swings are hung this way. Make sure you have a tall enough ladder and someone to spot you while attaching the eye bolt and shackle.
If you are hanging your swing from a tree, you have several options for attaching it to the tree. You can either make the rope long enough to wrap over the tree limb and tie a knot such as a bowline knot, you can buy limb saver straps and attach your rope or chains to them, or you can use hardware similar to the ones used on a porch.
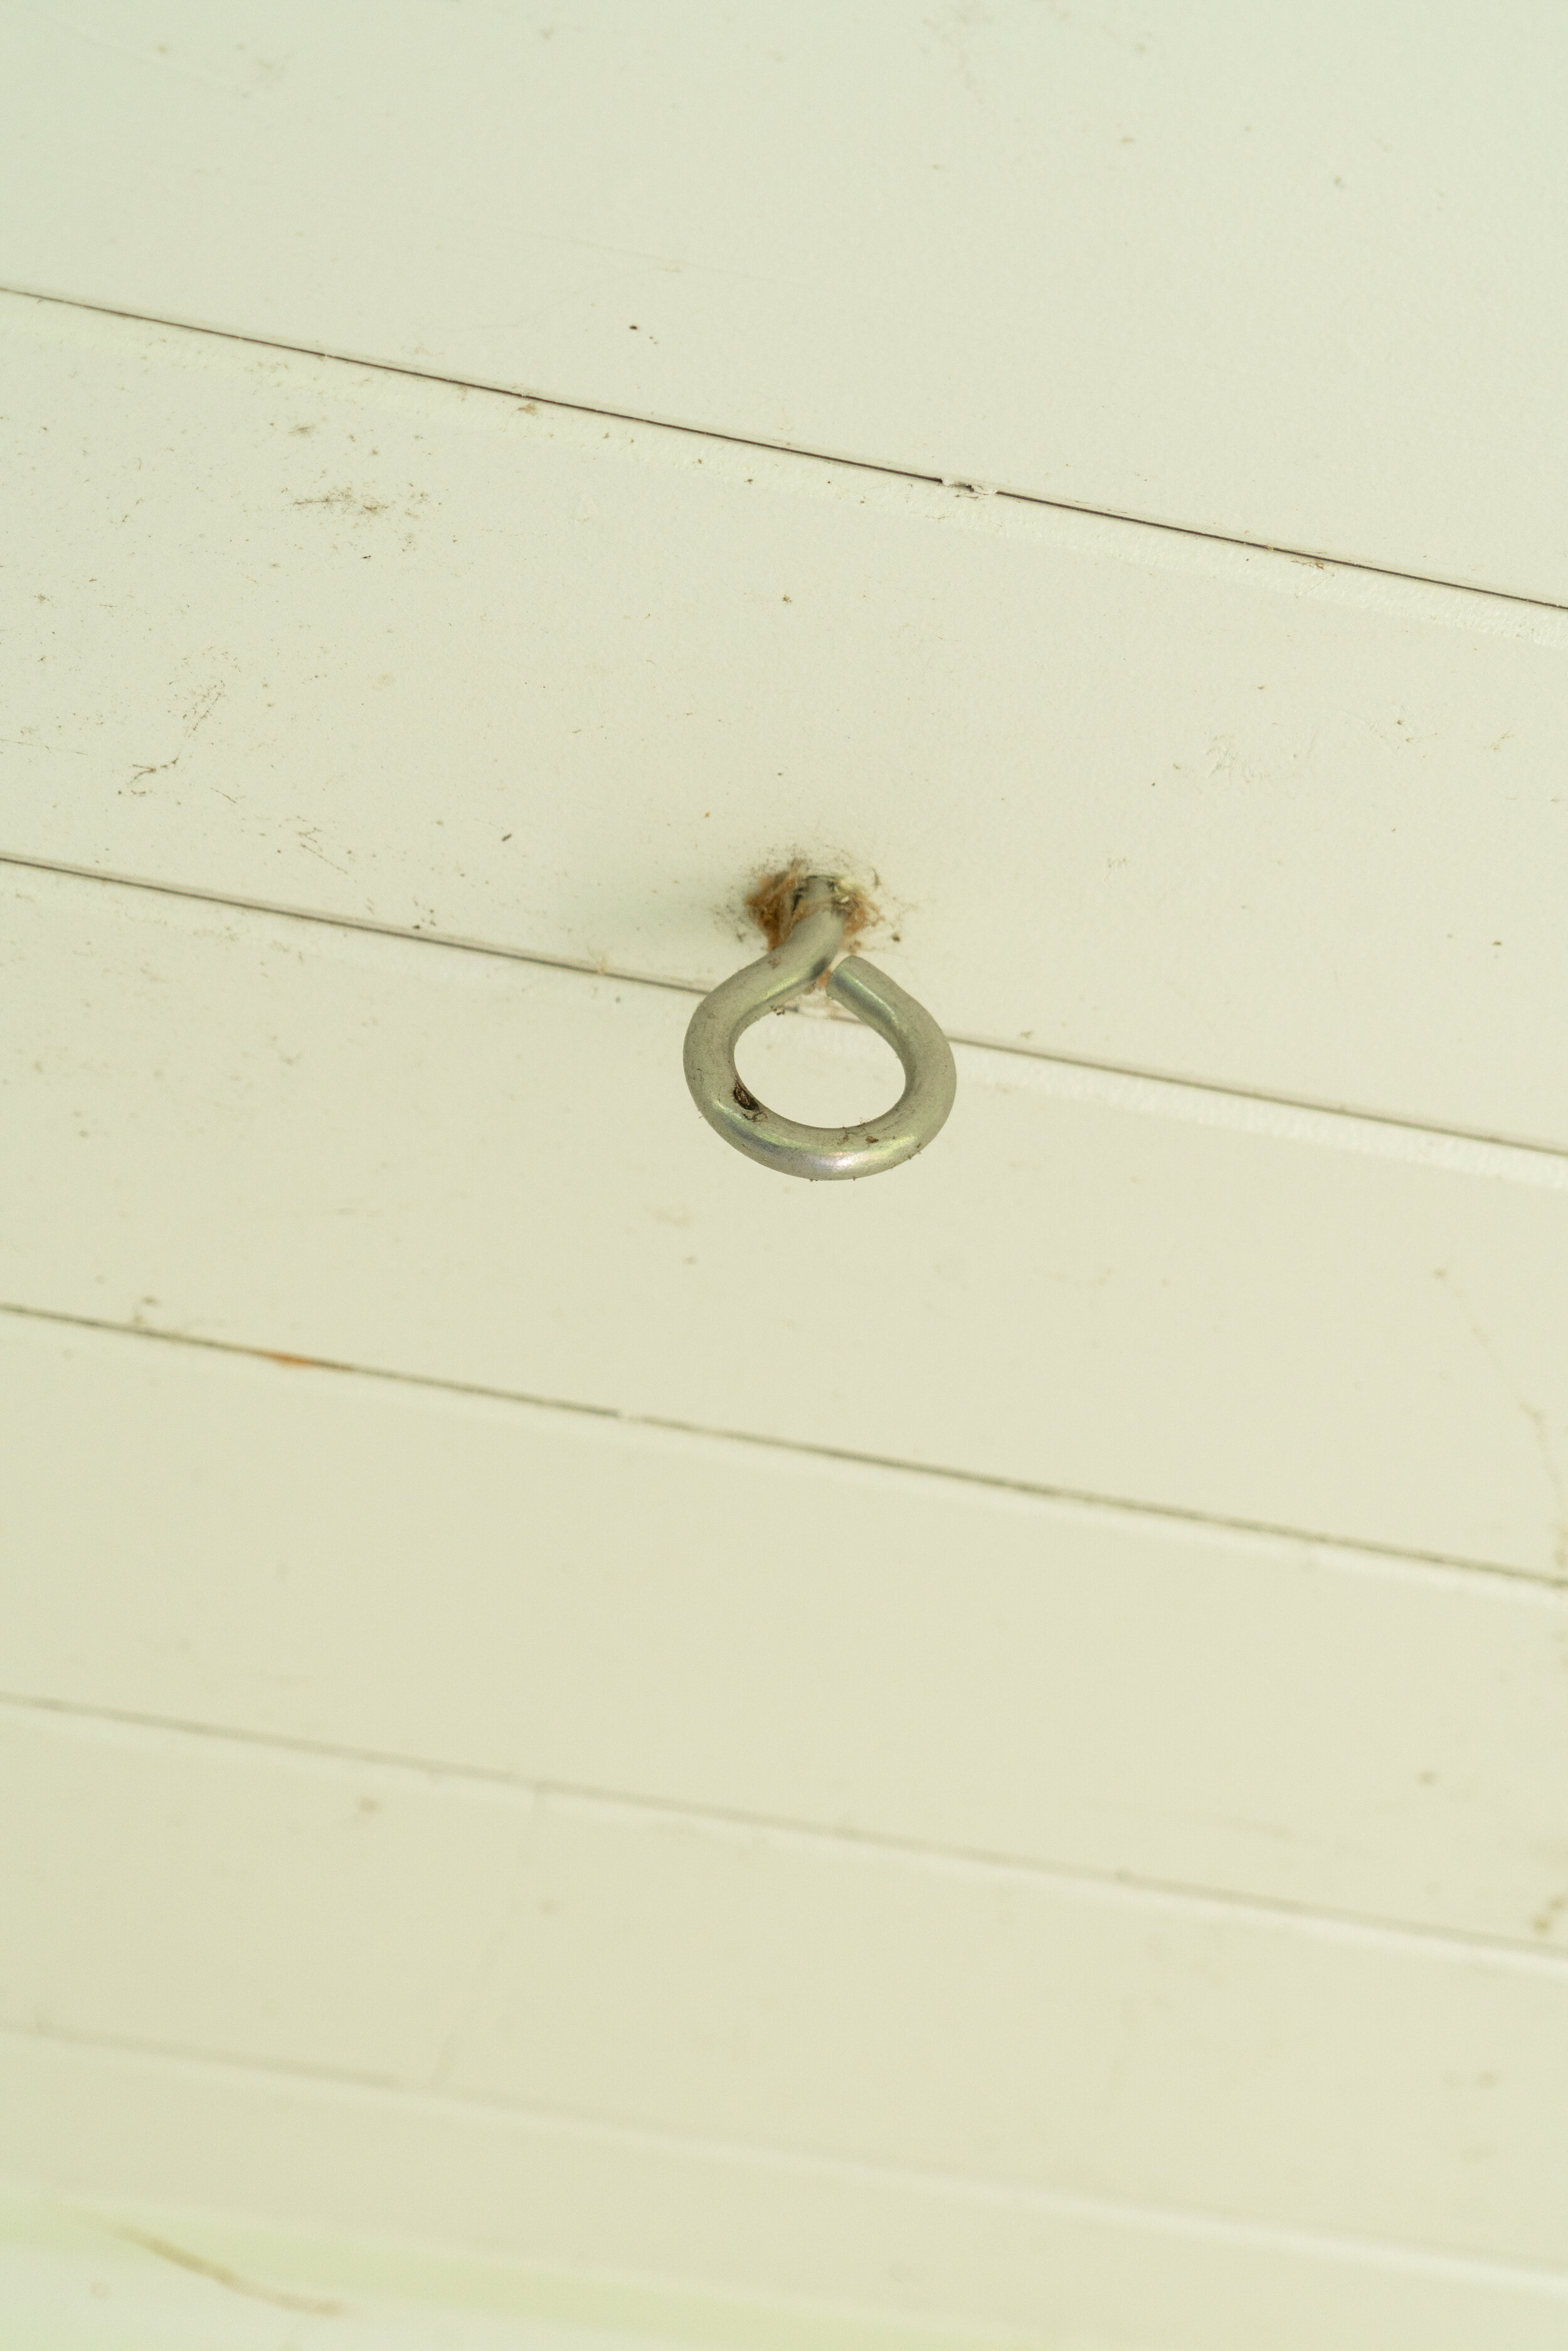
Screw the eye/lag bolt into through the tongue and groove and into the joist
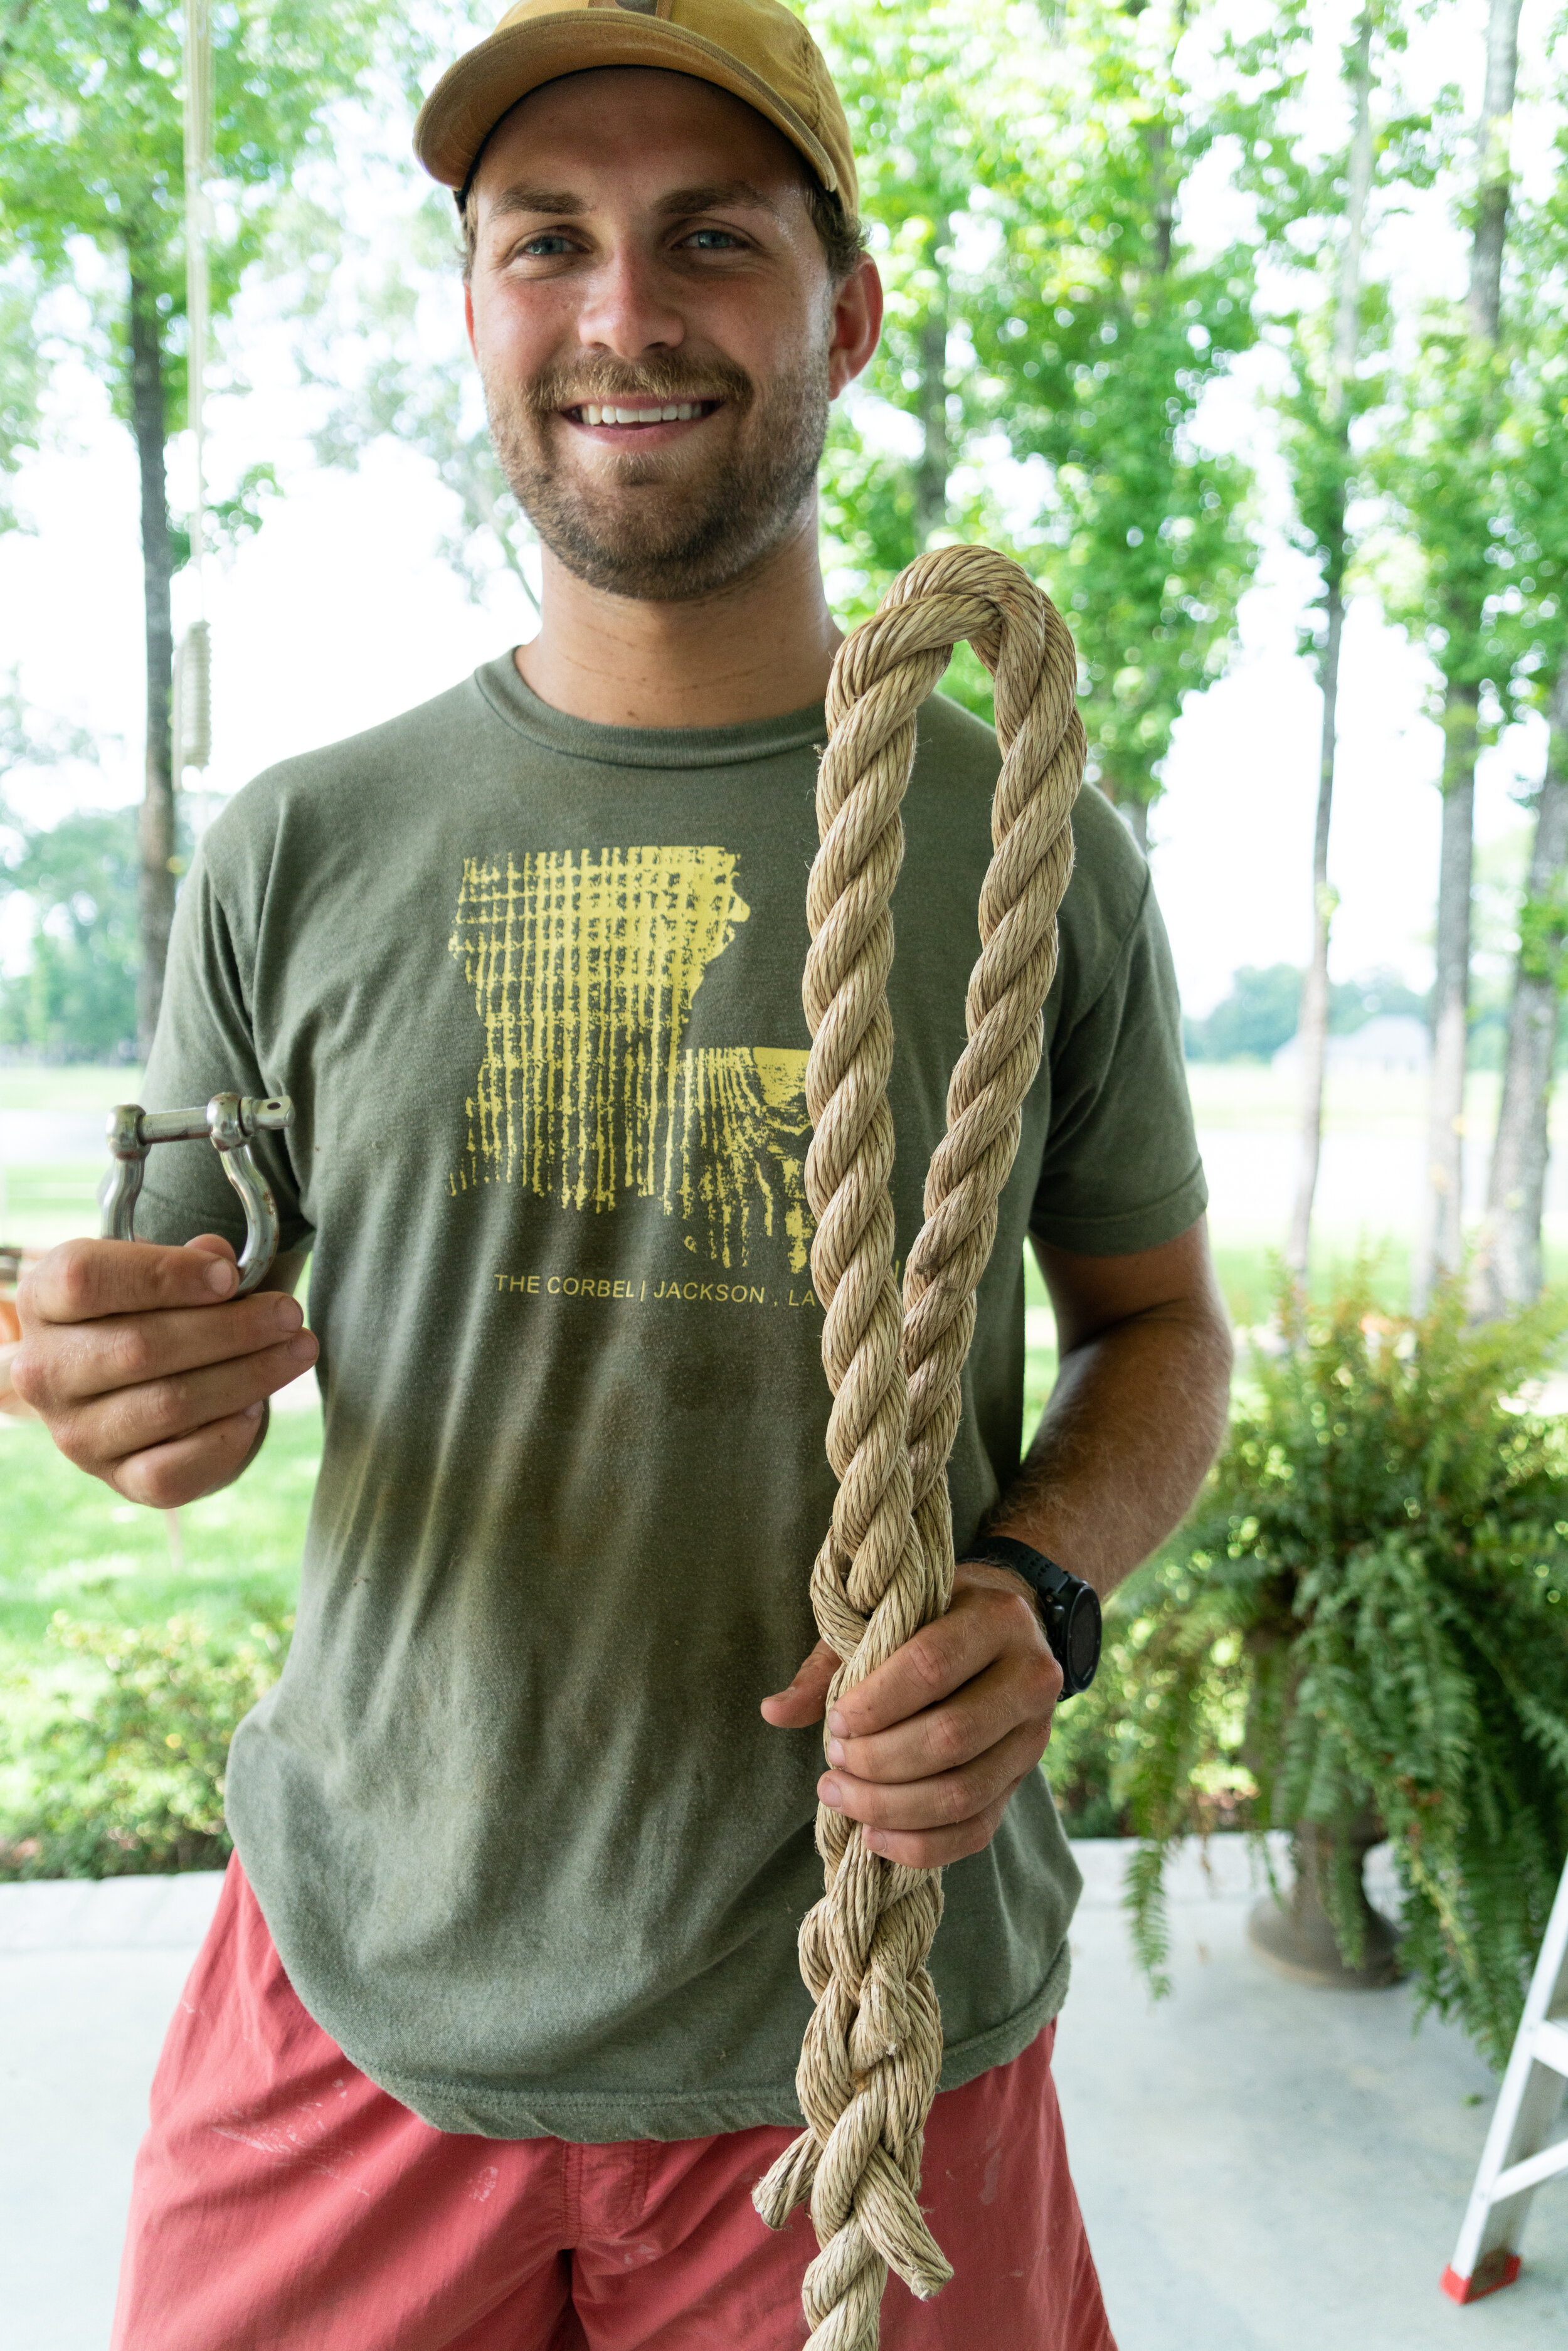
Shackle and braided end of the rope
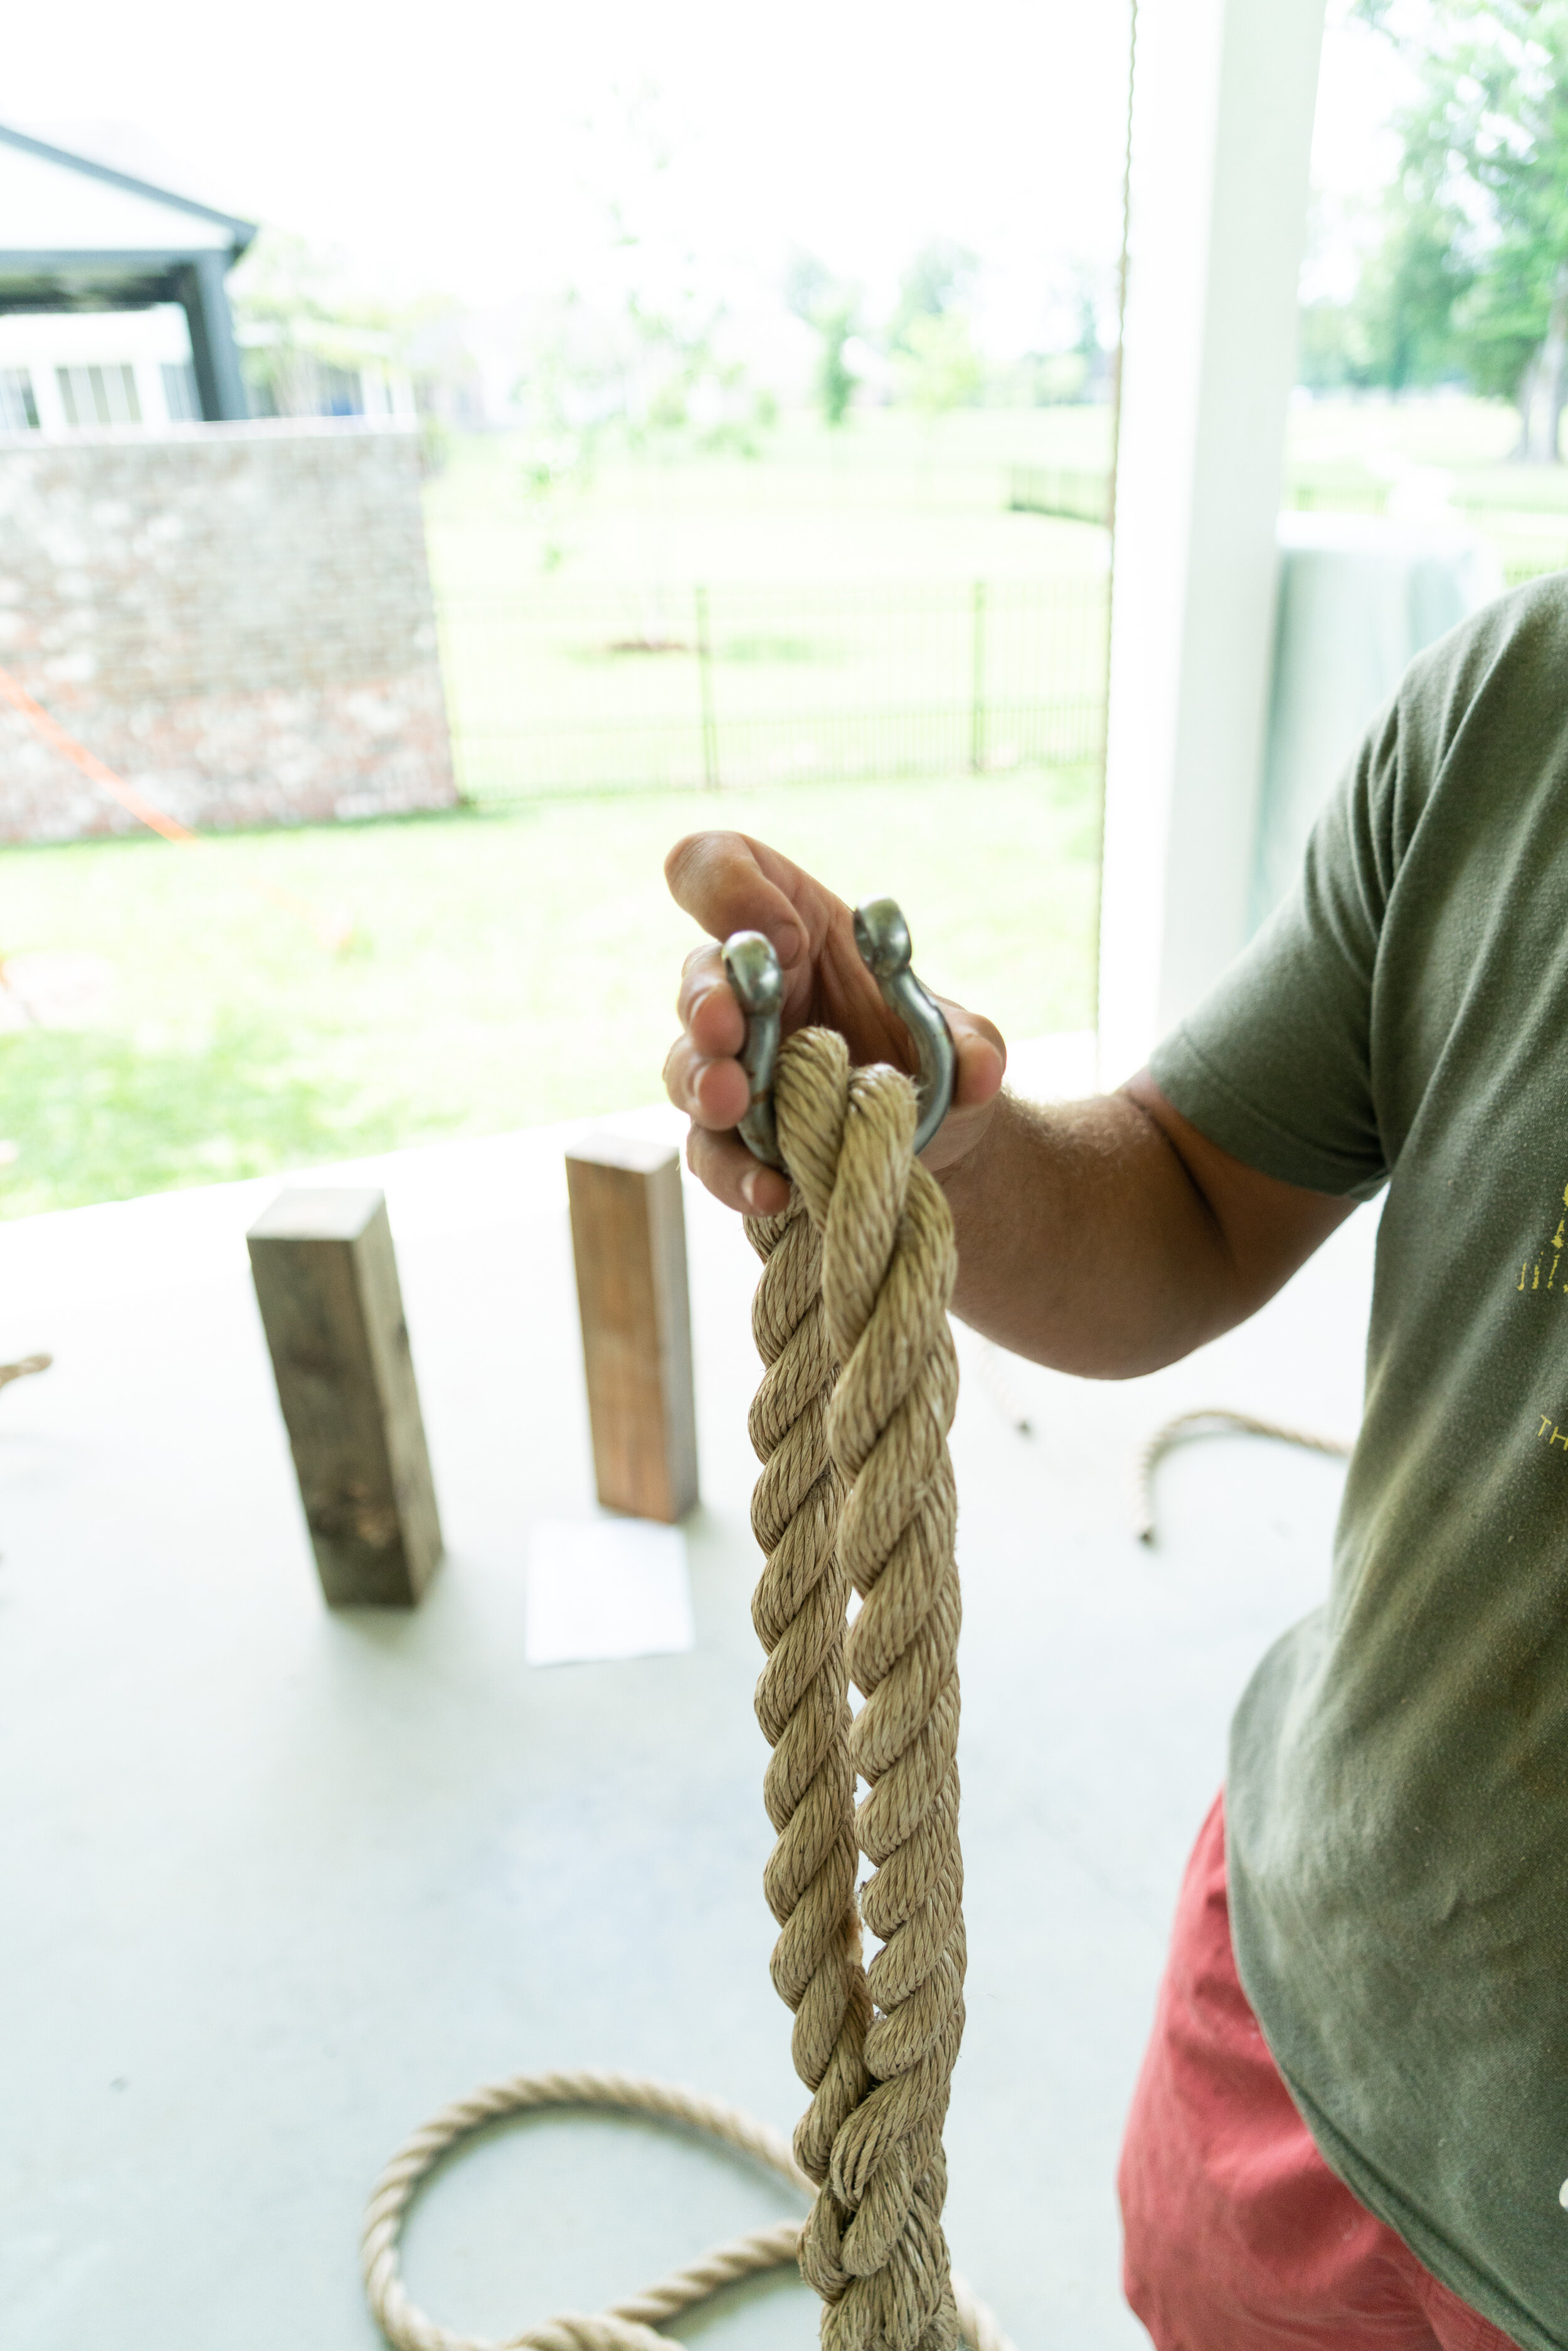
Put the braided end of the rope through the shackle
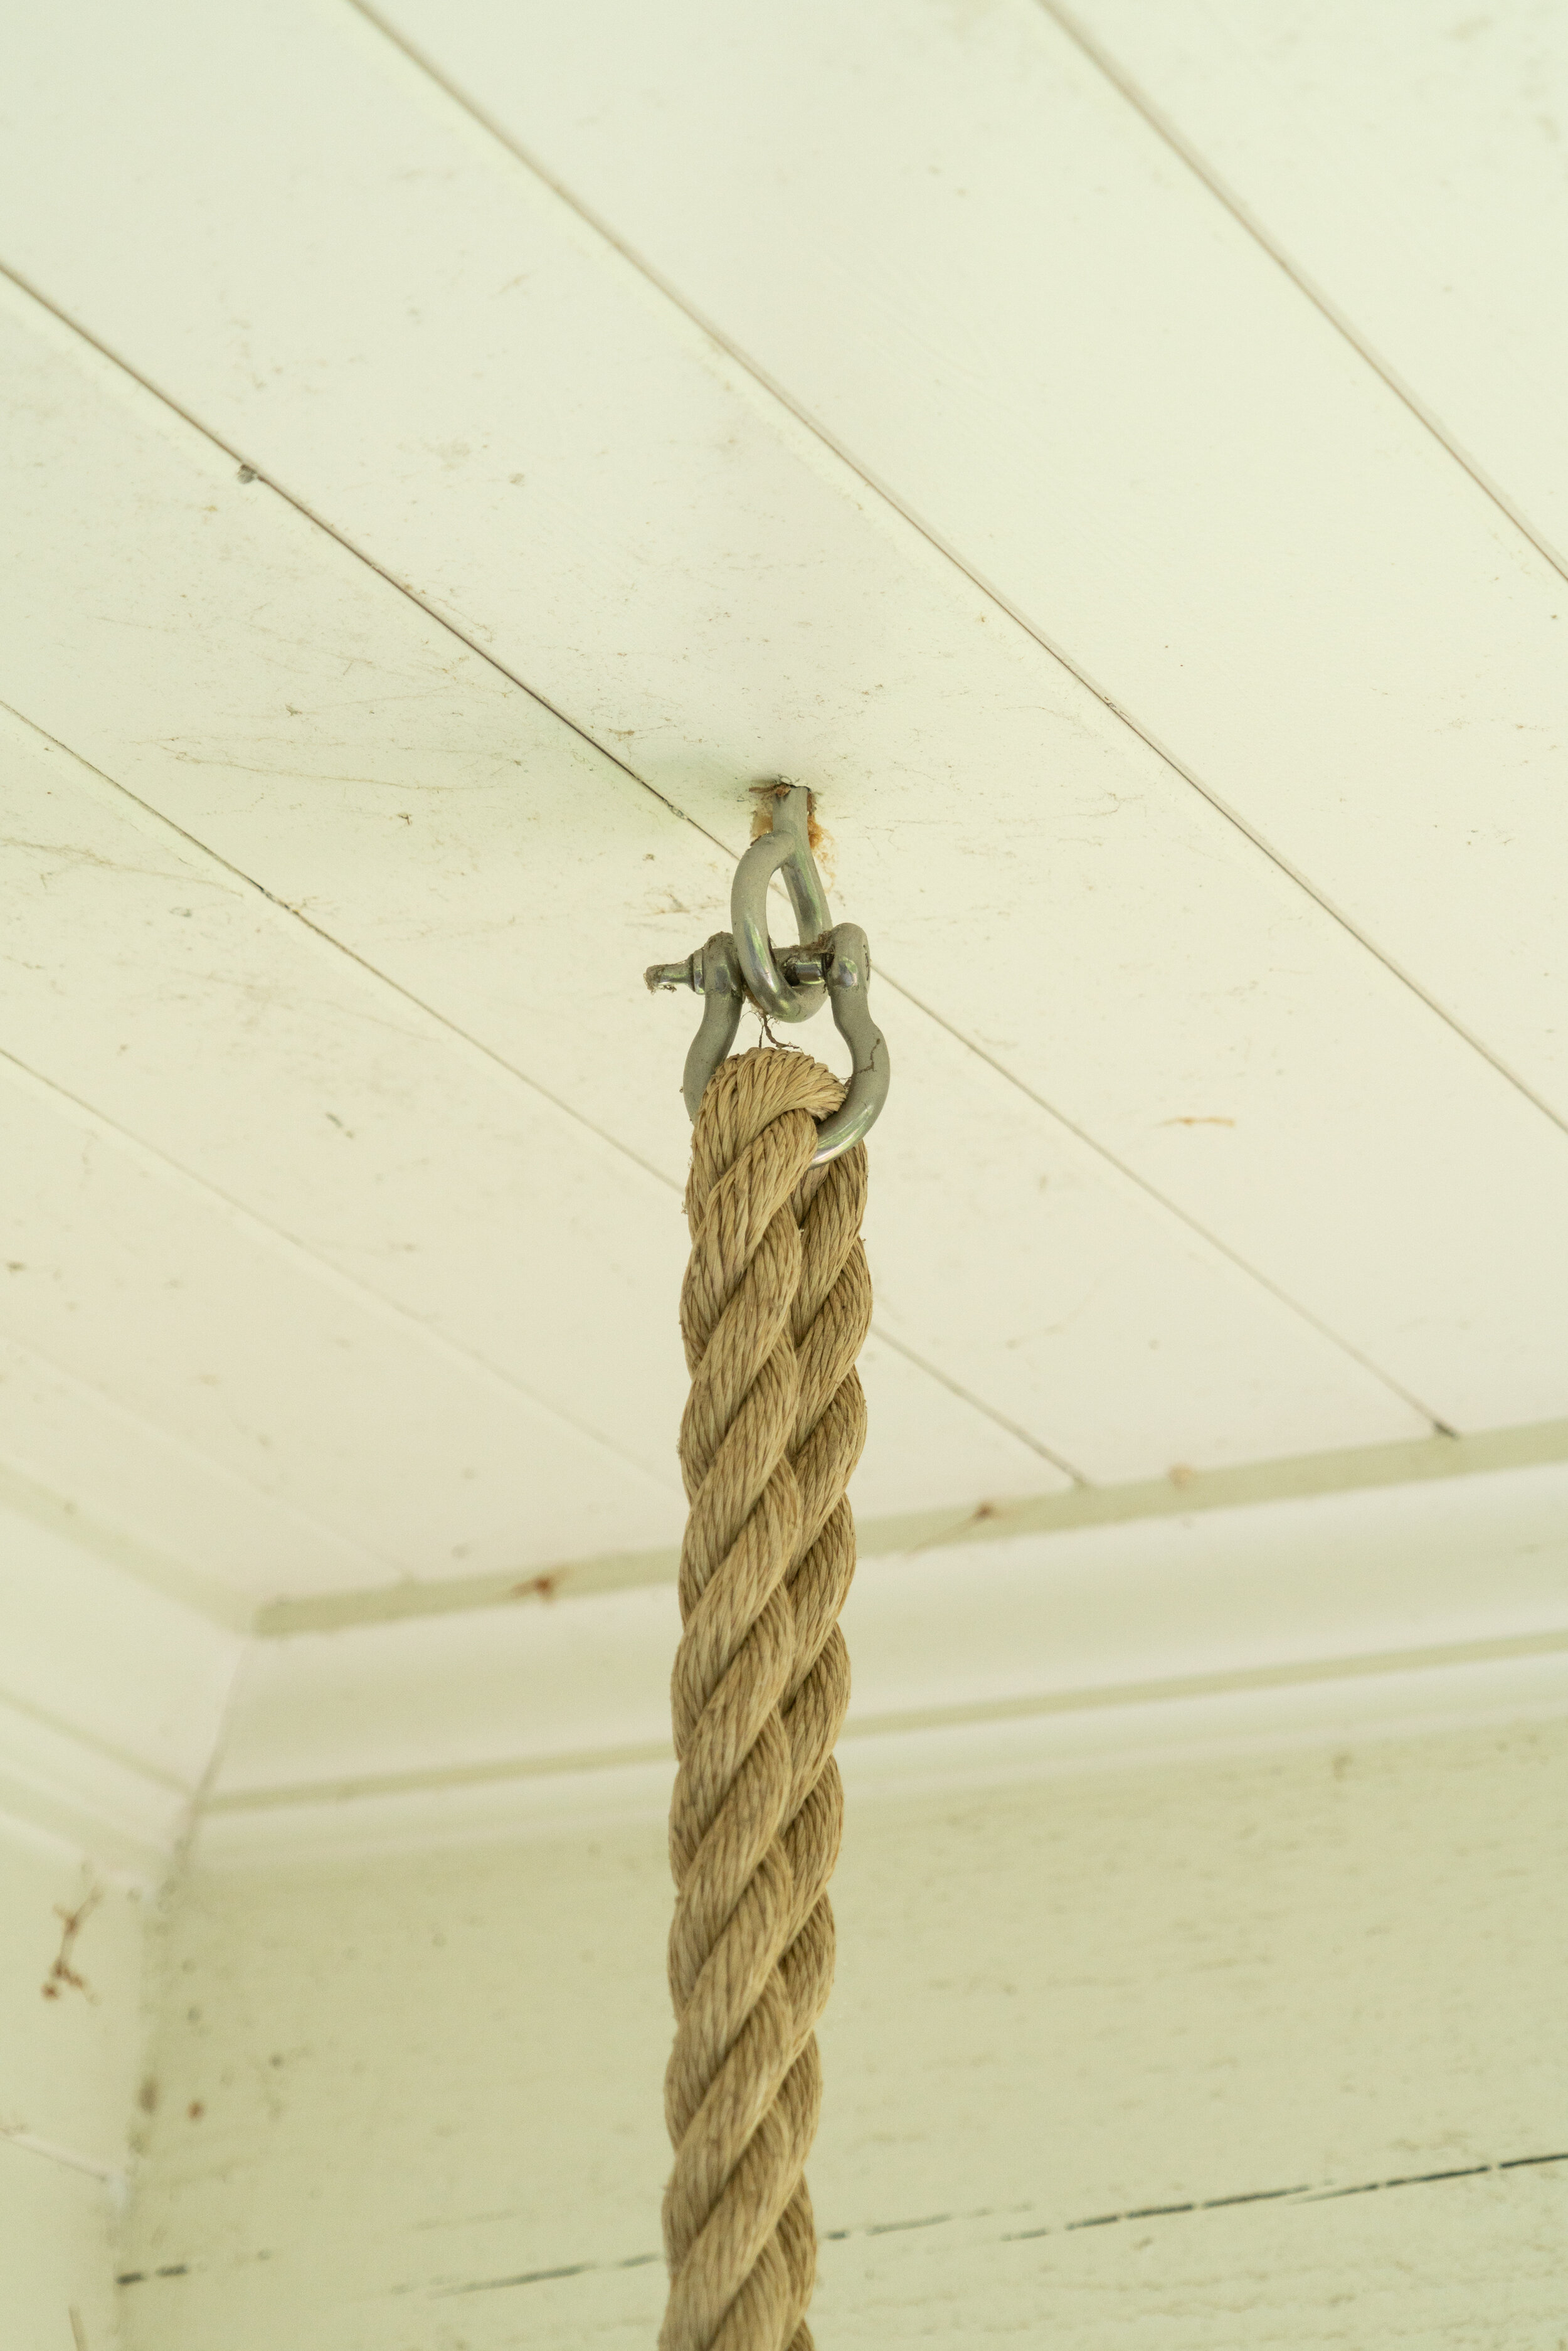
Screw the shackle through the eye bolt until tight
STEP 3: SET YOUR SWING TO A PRESET POSITION
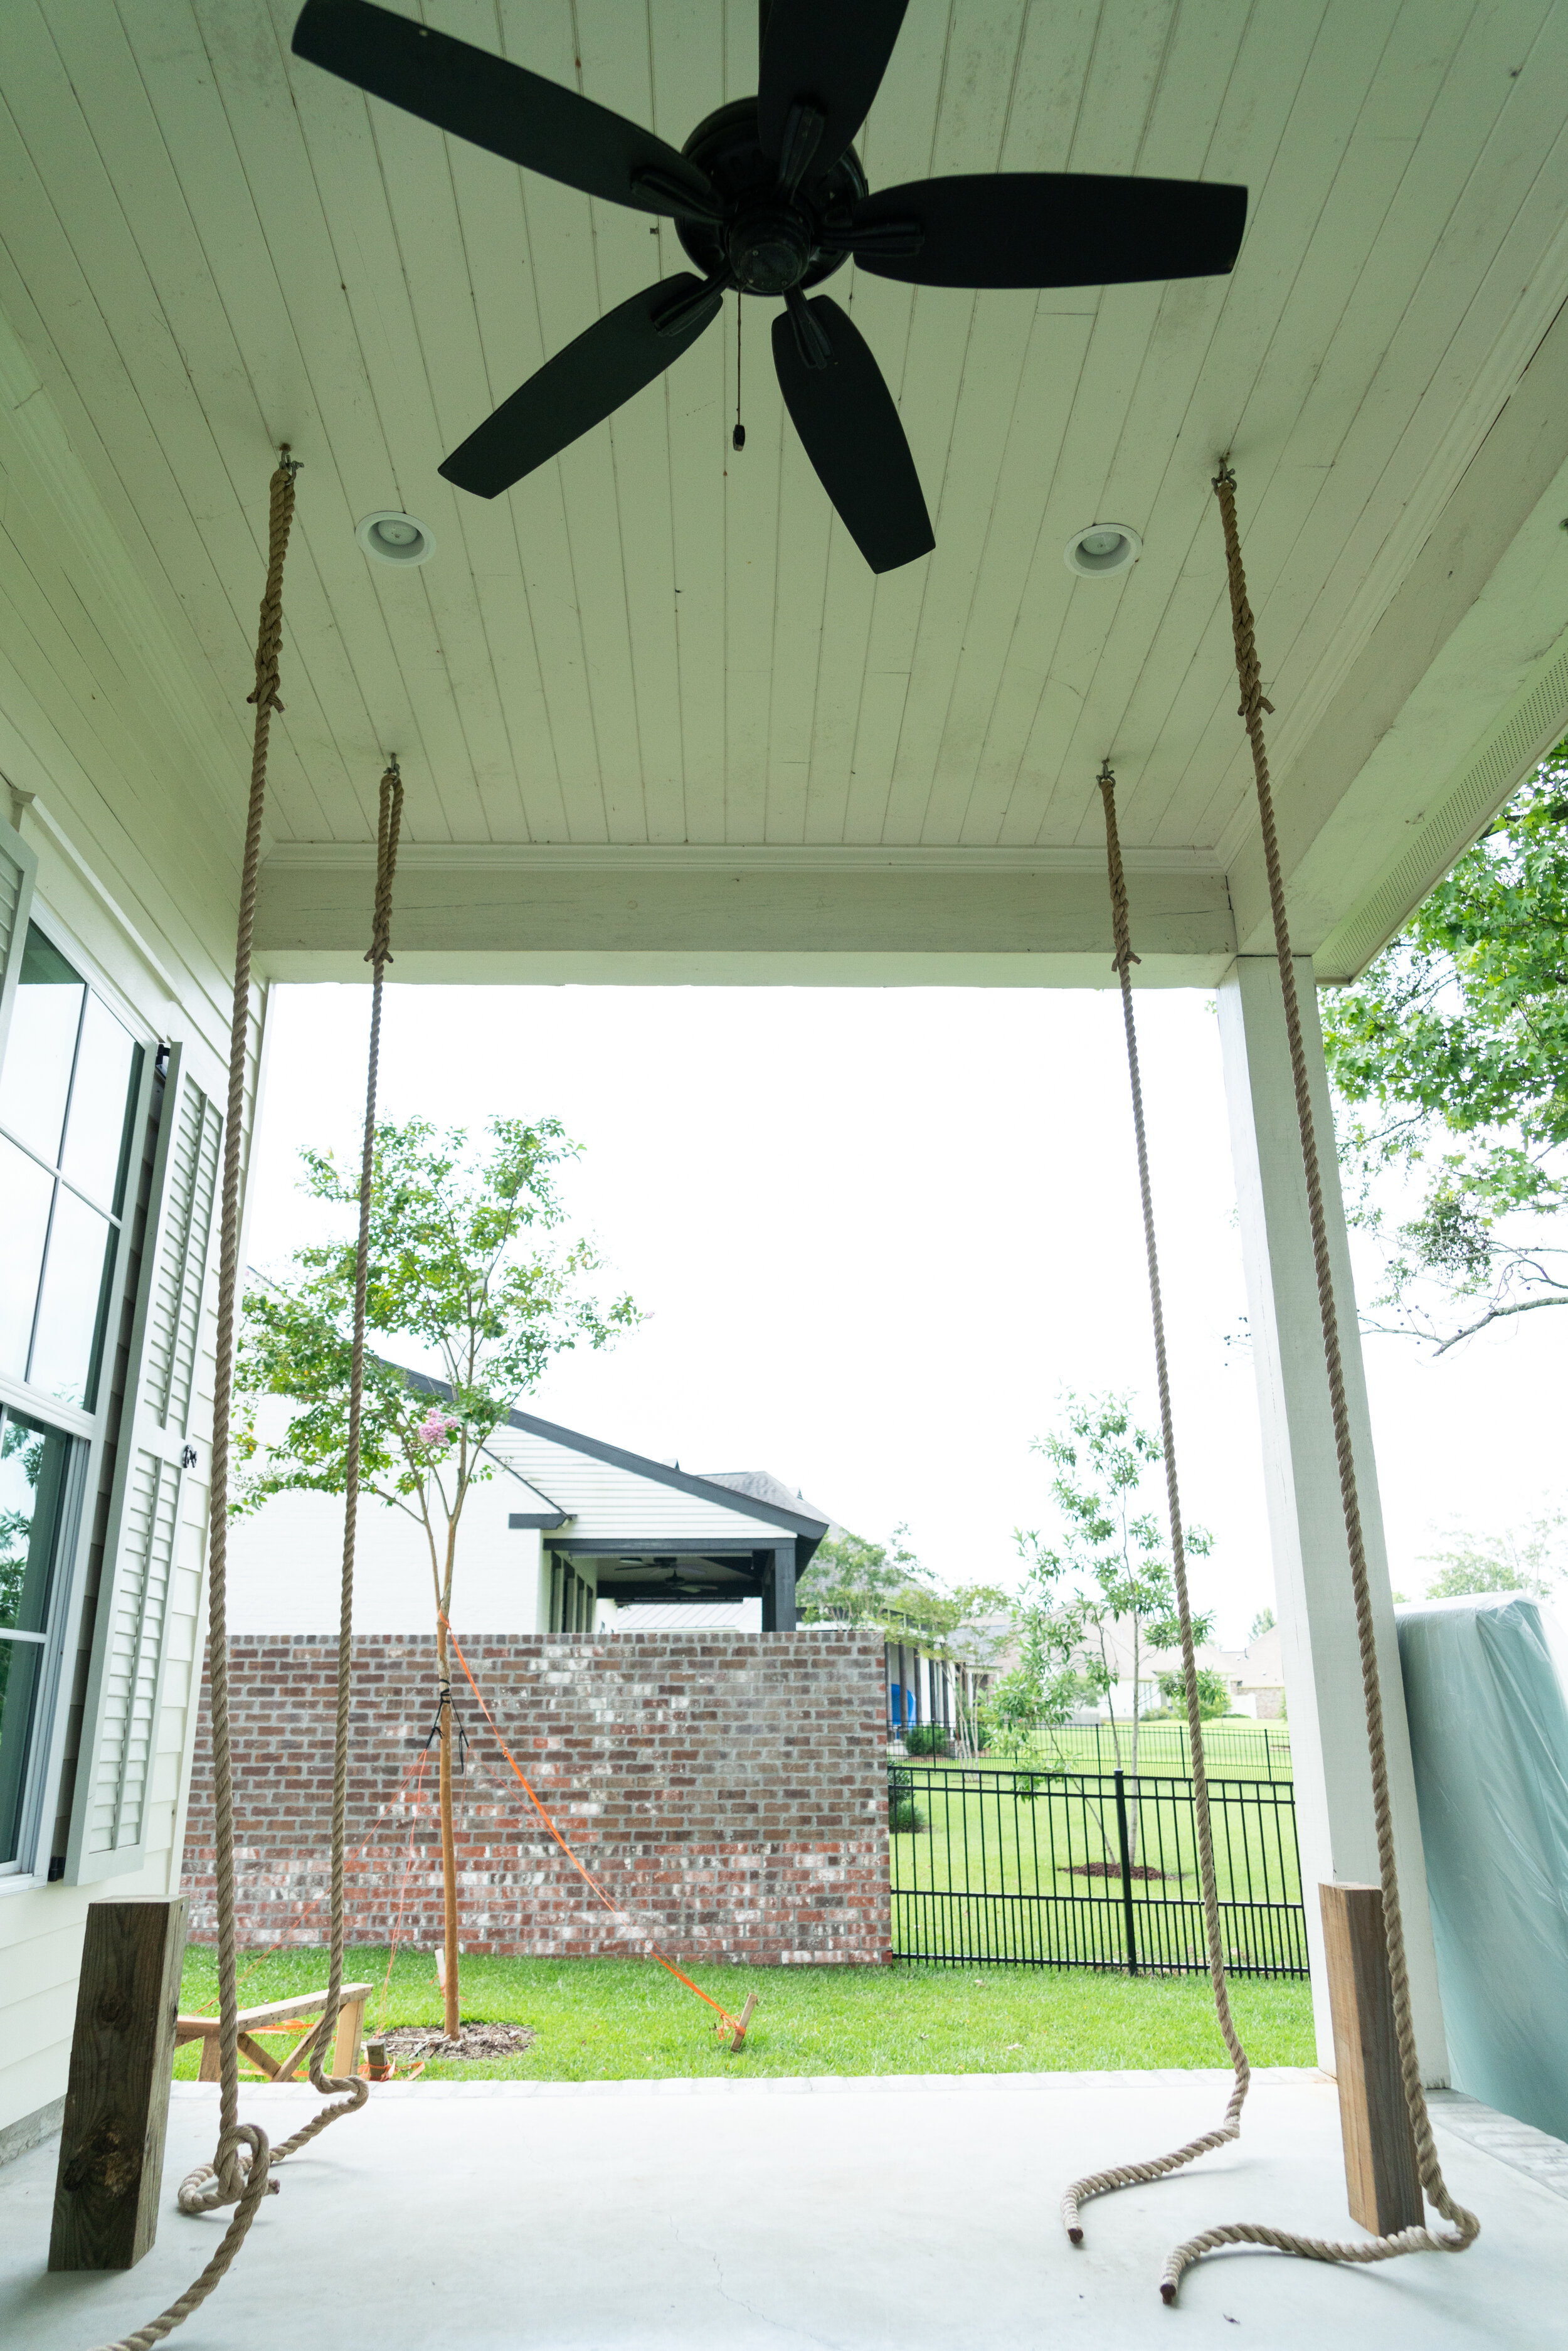
This step is the most important for making your job as easy and quick as possible. Find something to set your porch swing or bed swing on while you tie your knots such as a cinderblock, piece of wood, five-gallon bucket, or anything else strong enough and steady enough to hold your swing in a set position. Having the swing in a set position will make it much easier to tie your knot and will result in a level swing once you are done. For bed swings, we recommend setting your swing to 21 inches above the floor to achieve a comfortable distance from the floor once the knot has been tightened and the weight of people sitting on it stretches the rope. Following through on this step helps alleviate a lot of headaches due to having to manipulate the knots and levelness.

Having two stands to place your swing on make the job much easier when tying your rope.
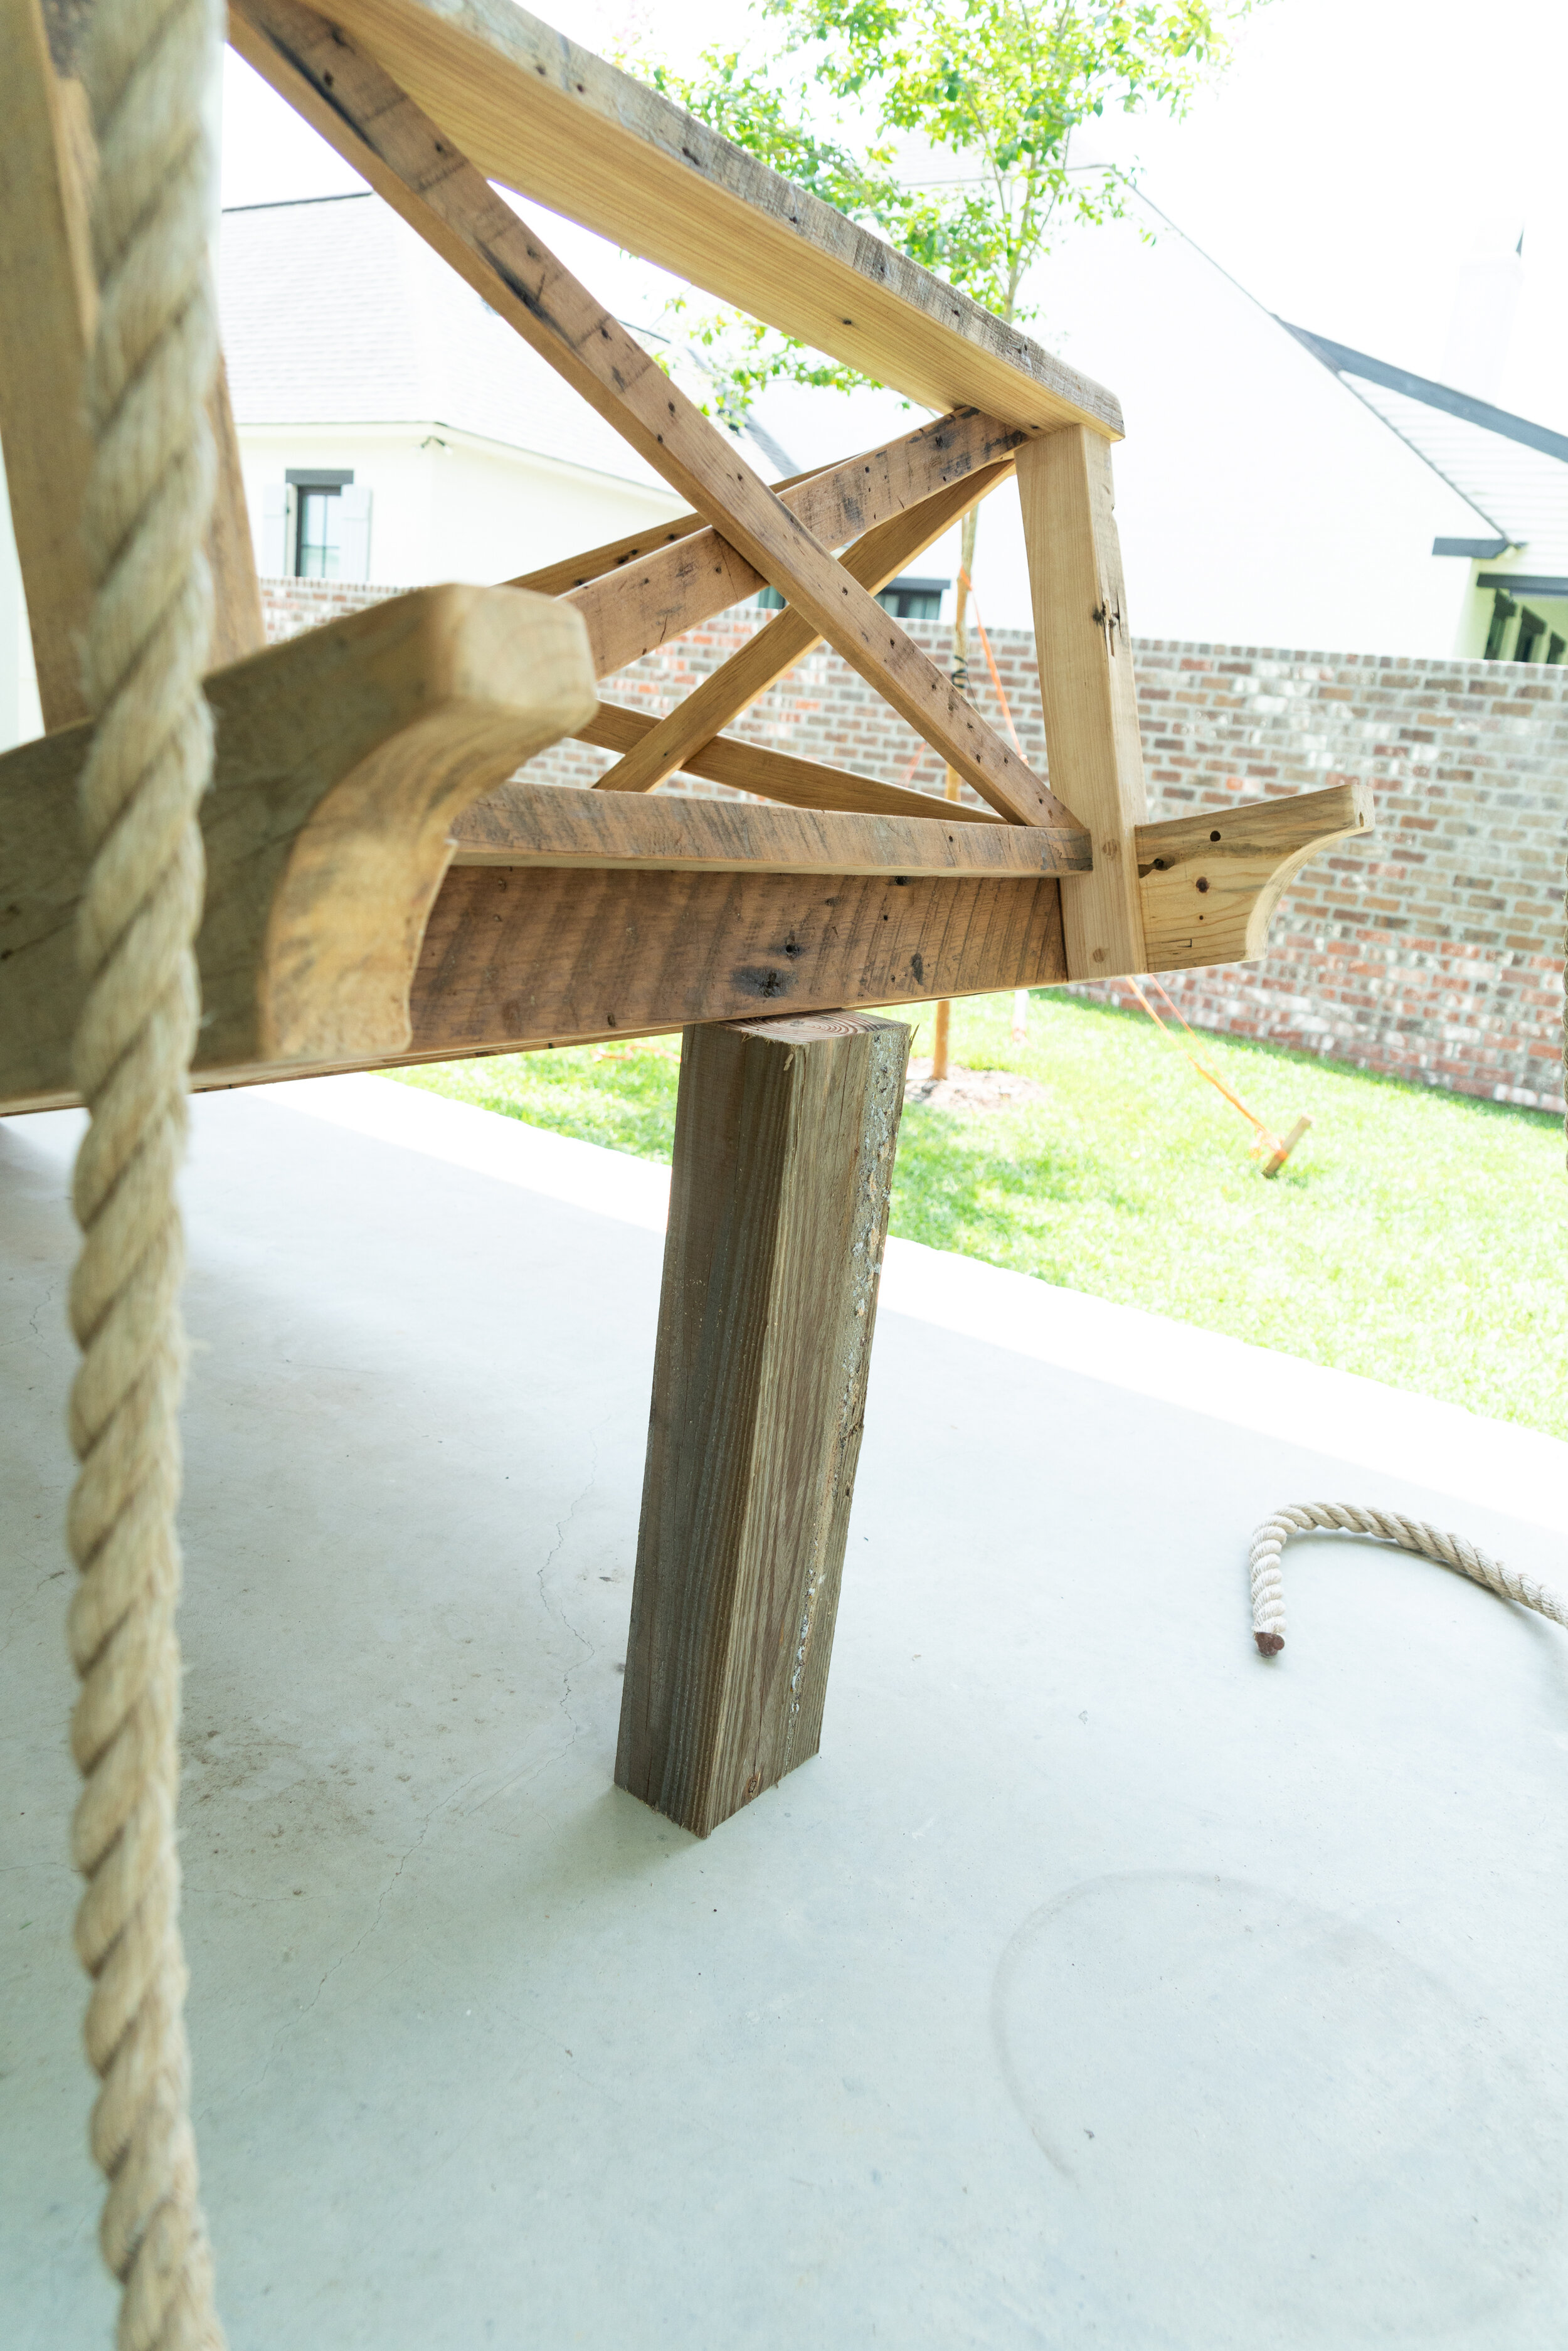
If you only have one item to set your swing on, place it on either end, thread the two ropes, tie, and do the same on the other side.
Thread your rope and take out all of the slack before tying your knot!
STEP 4: TIE YOUR KNOT
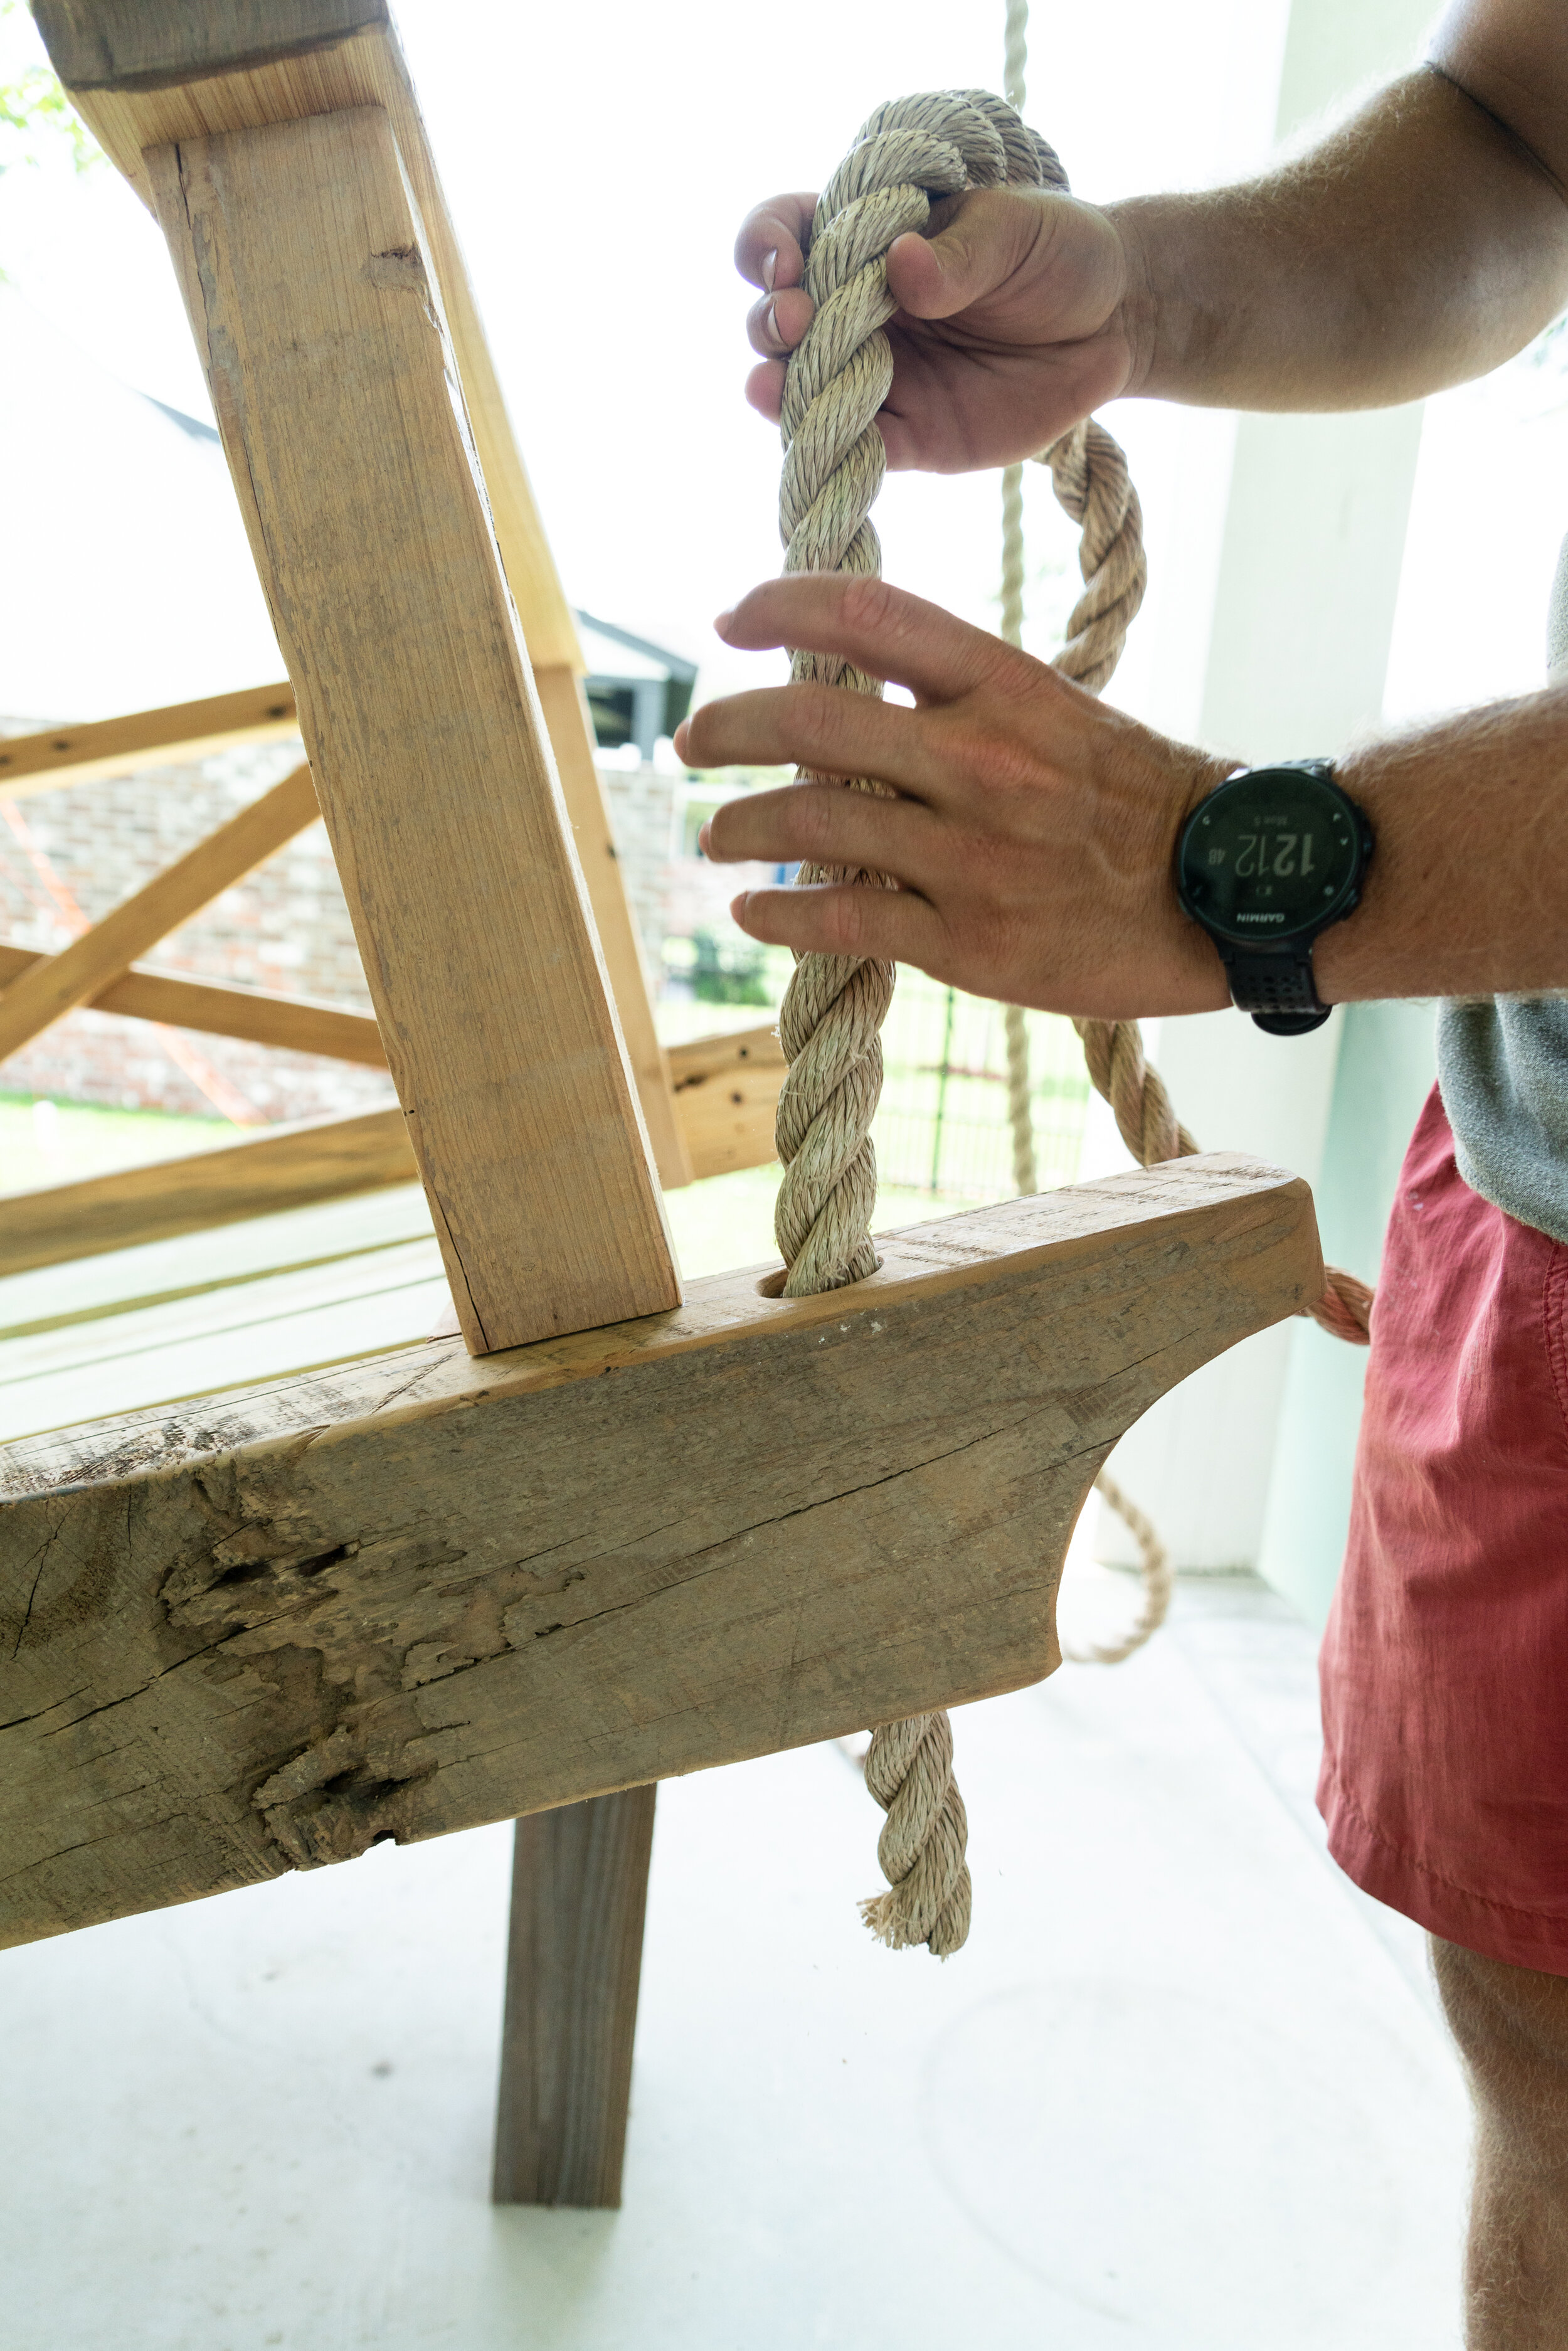
The swings we produce here at The Corbel have a predrilled hole on both sides of the swing at the end of the beams. Once you have positioned your swing 3-4 inches above where you want your swing to sit, thread the rope through the holes, tie a simple overhand knot, and snug it up to the bottom of the beam as best possible. If you do not have one of The Corbel swings or if your swing is set up differently, you can still follow the simple process for hanging the swing.
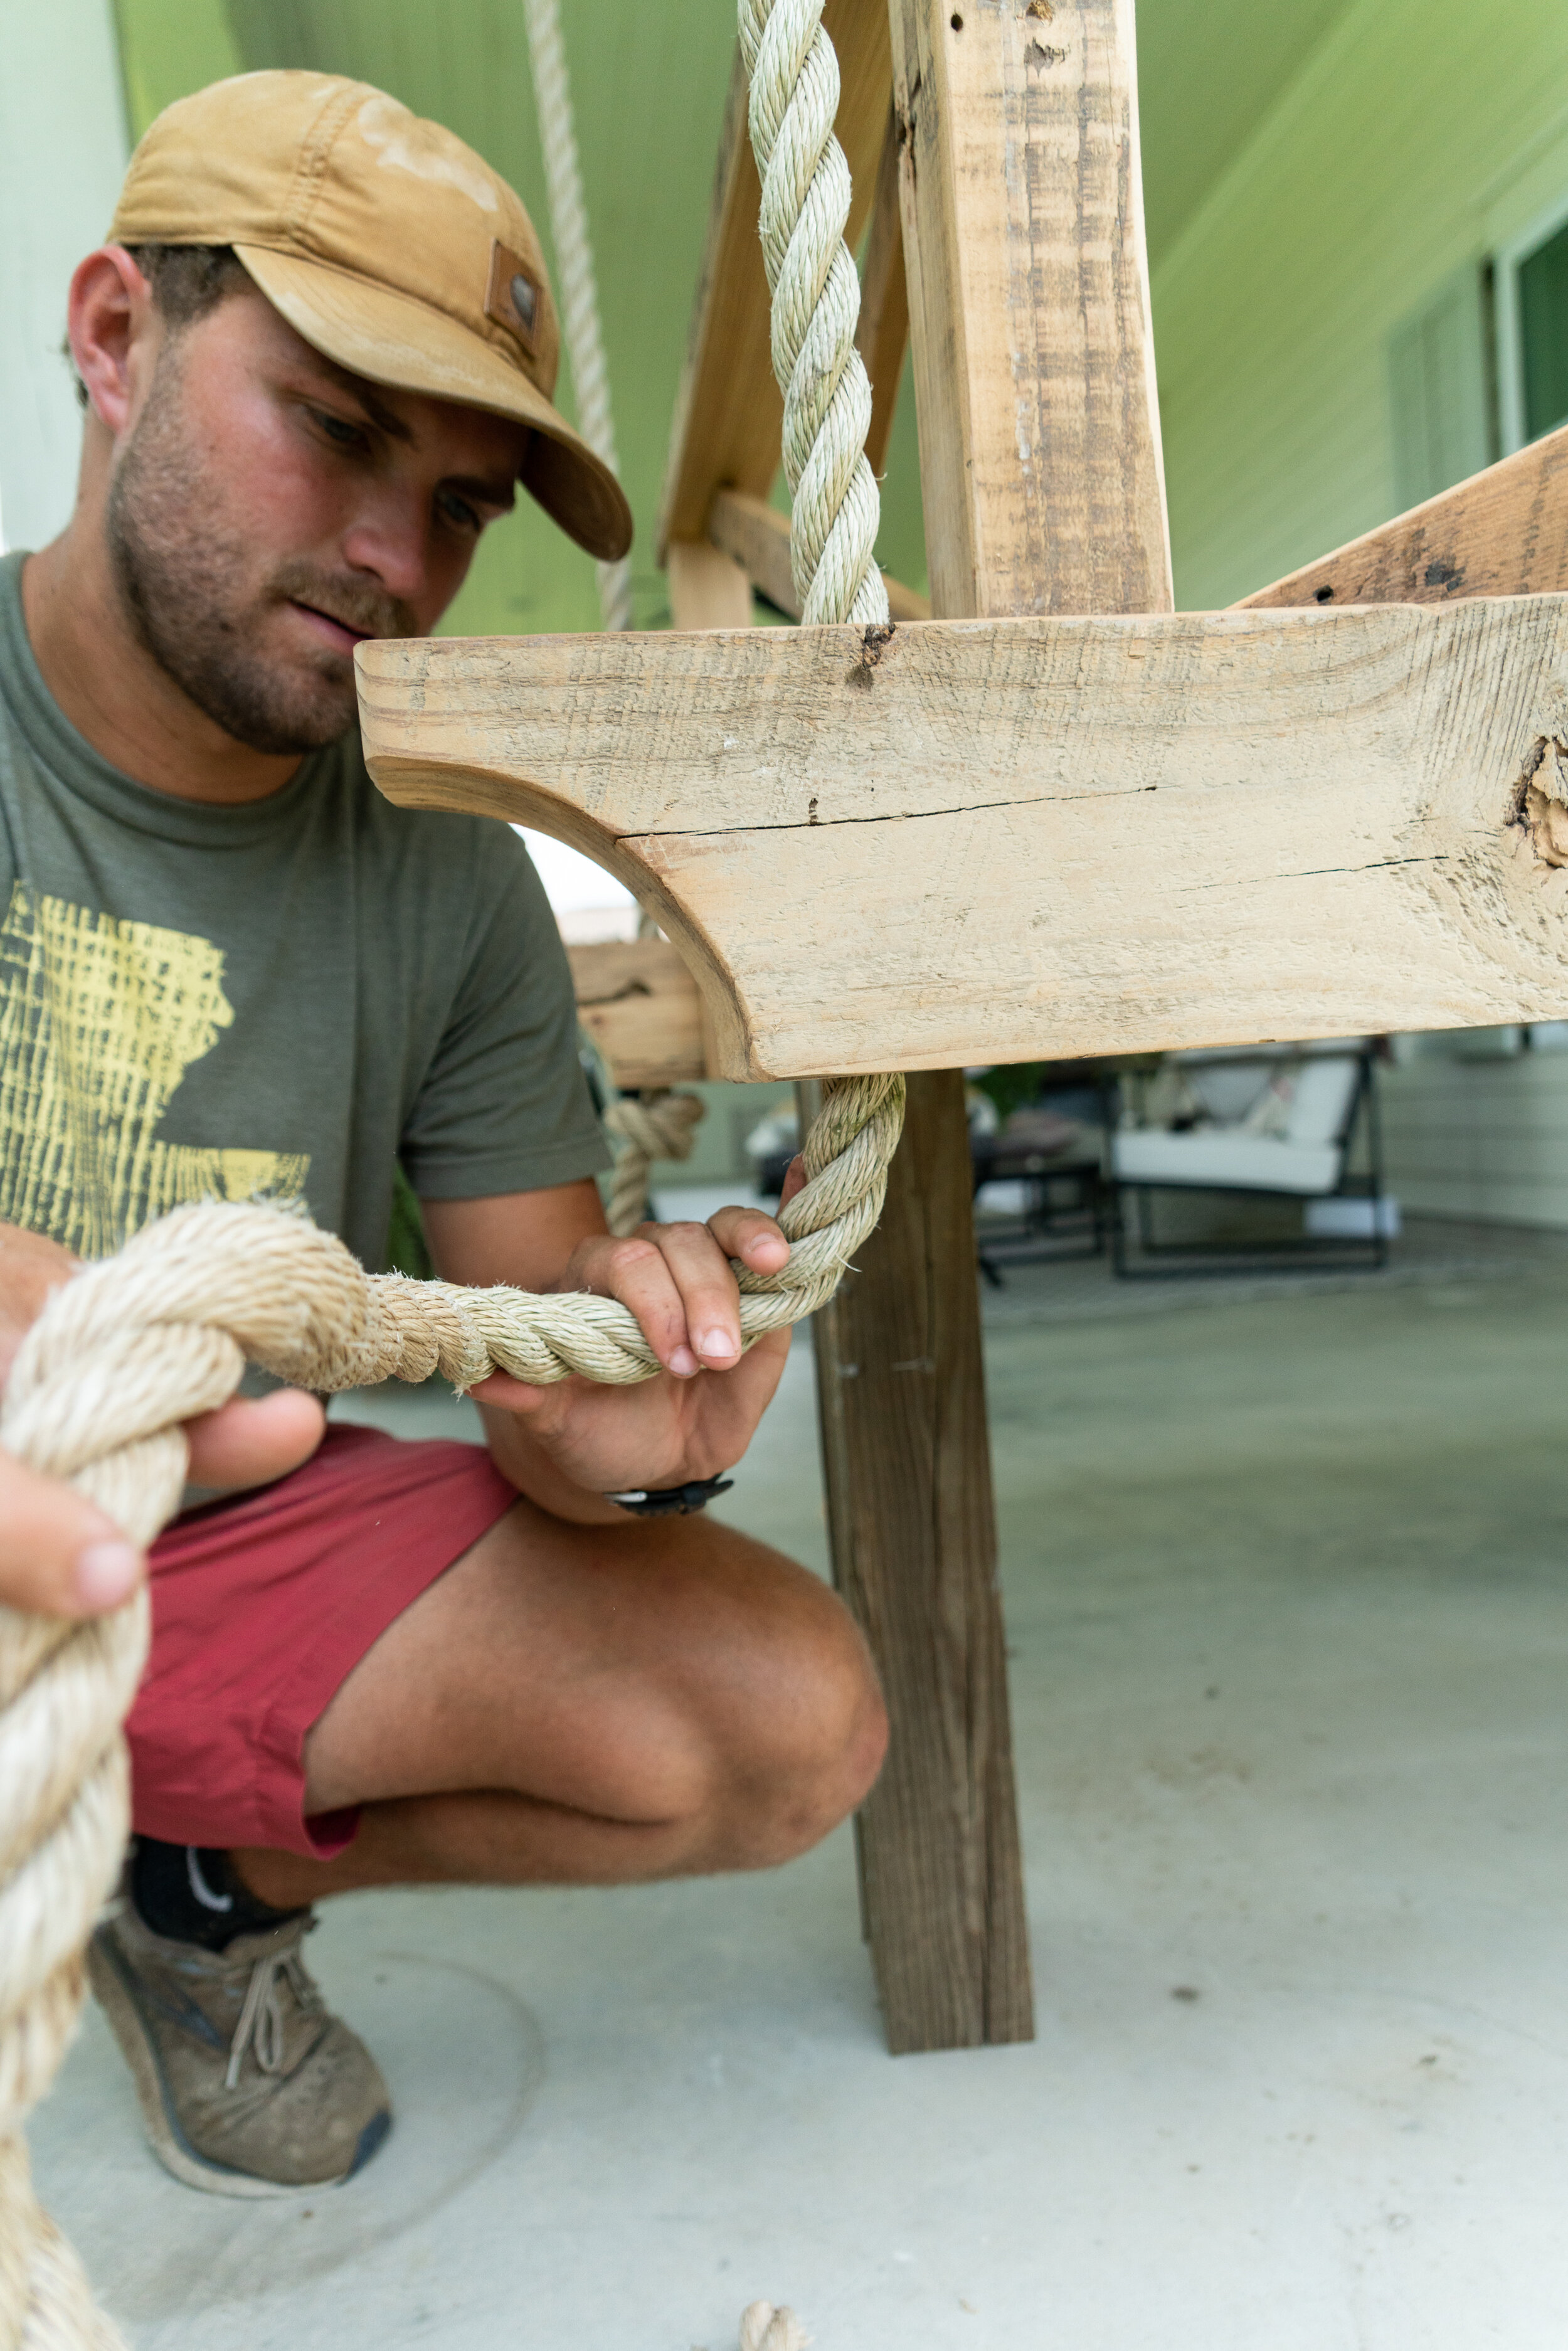
With both hands, position the loose end across your body.
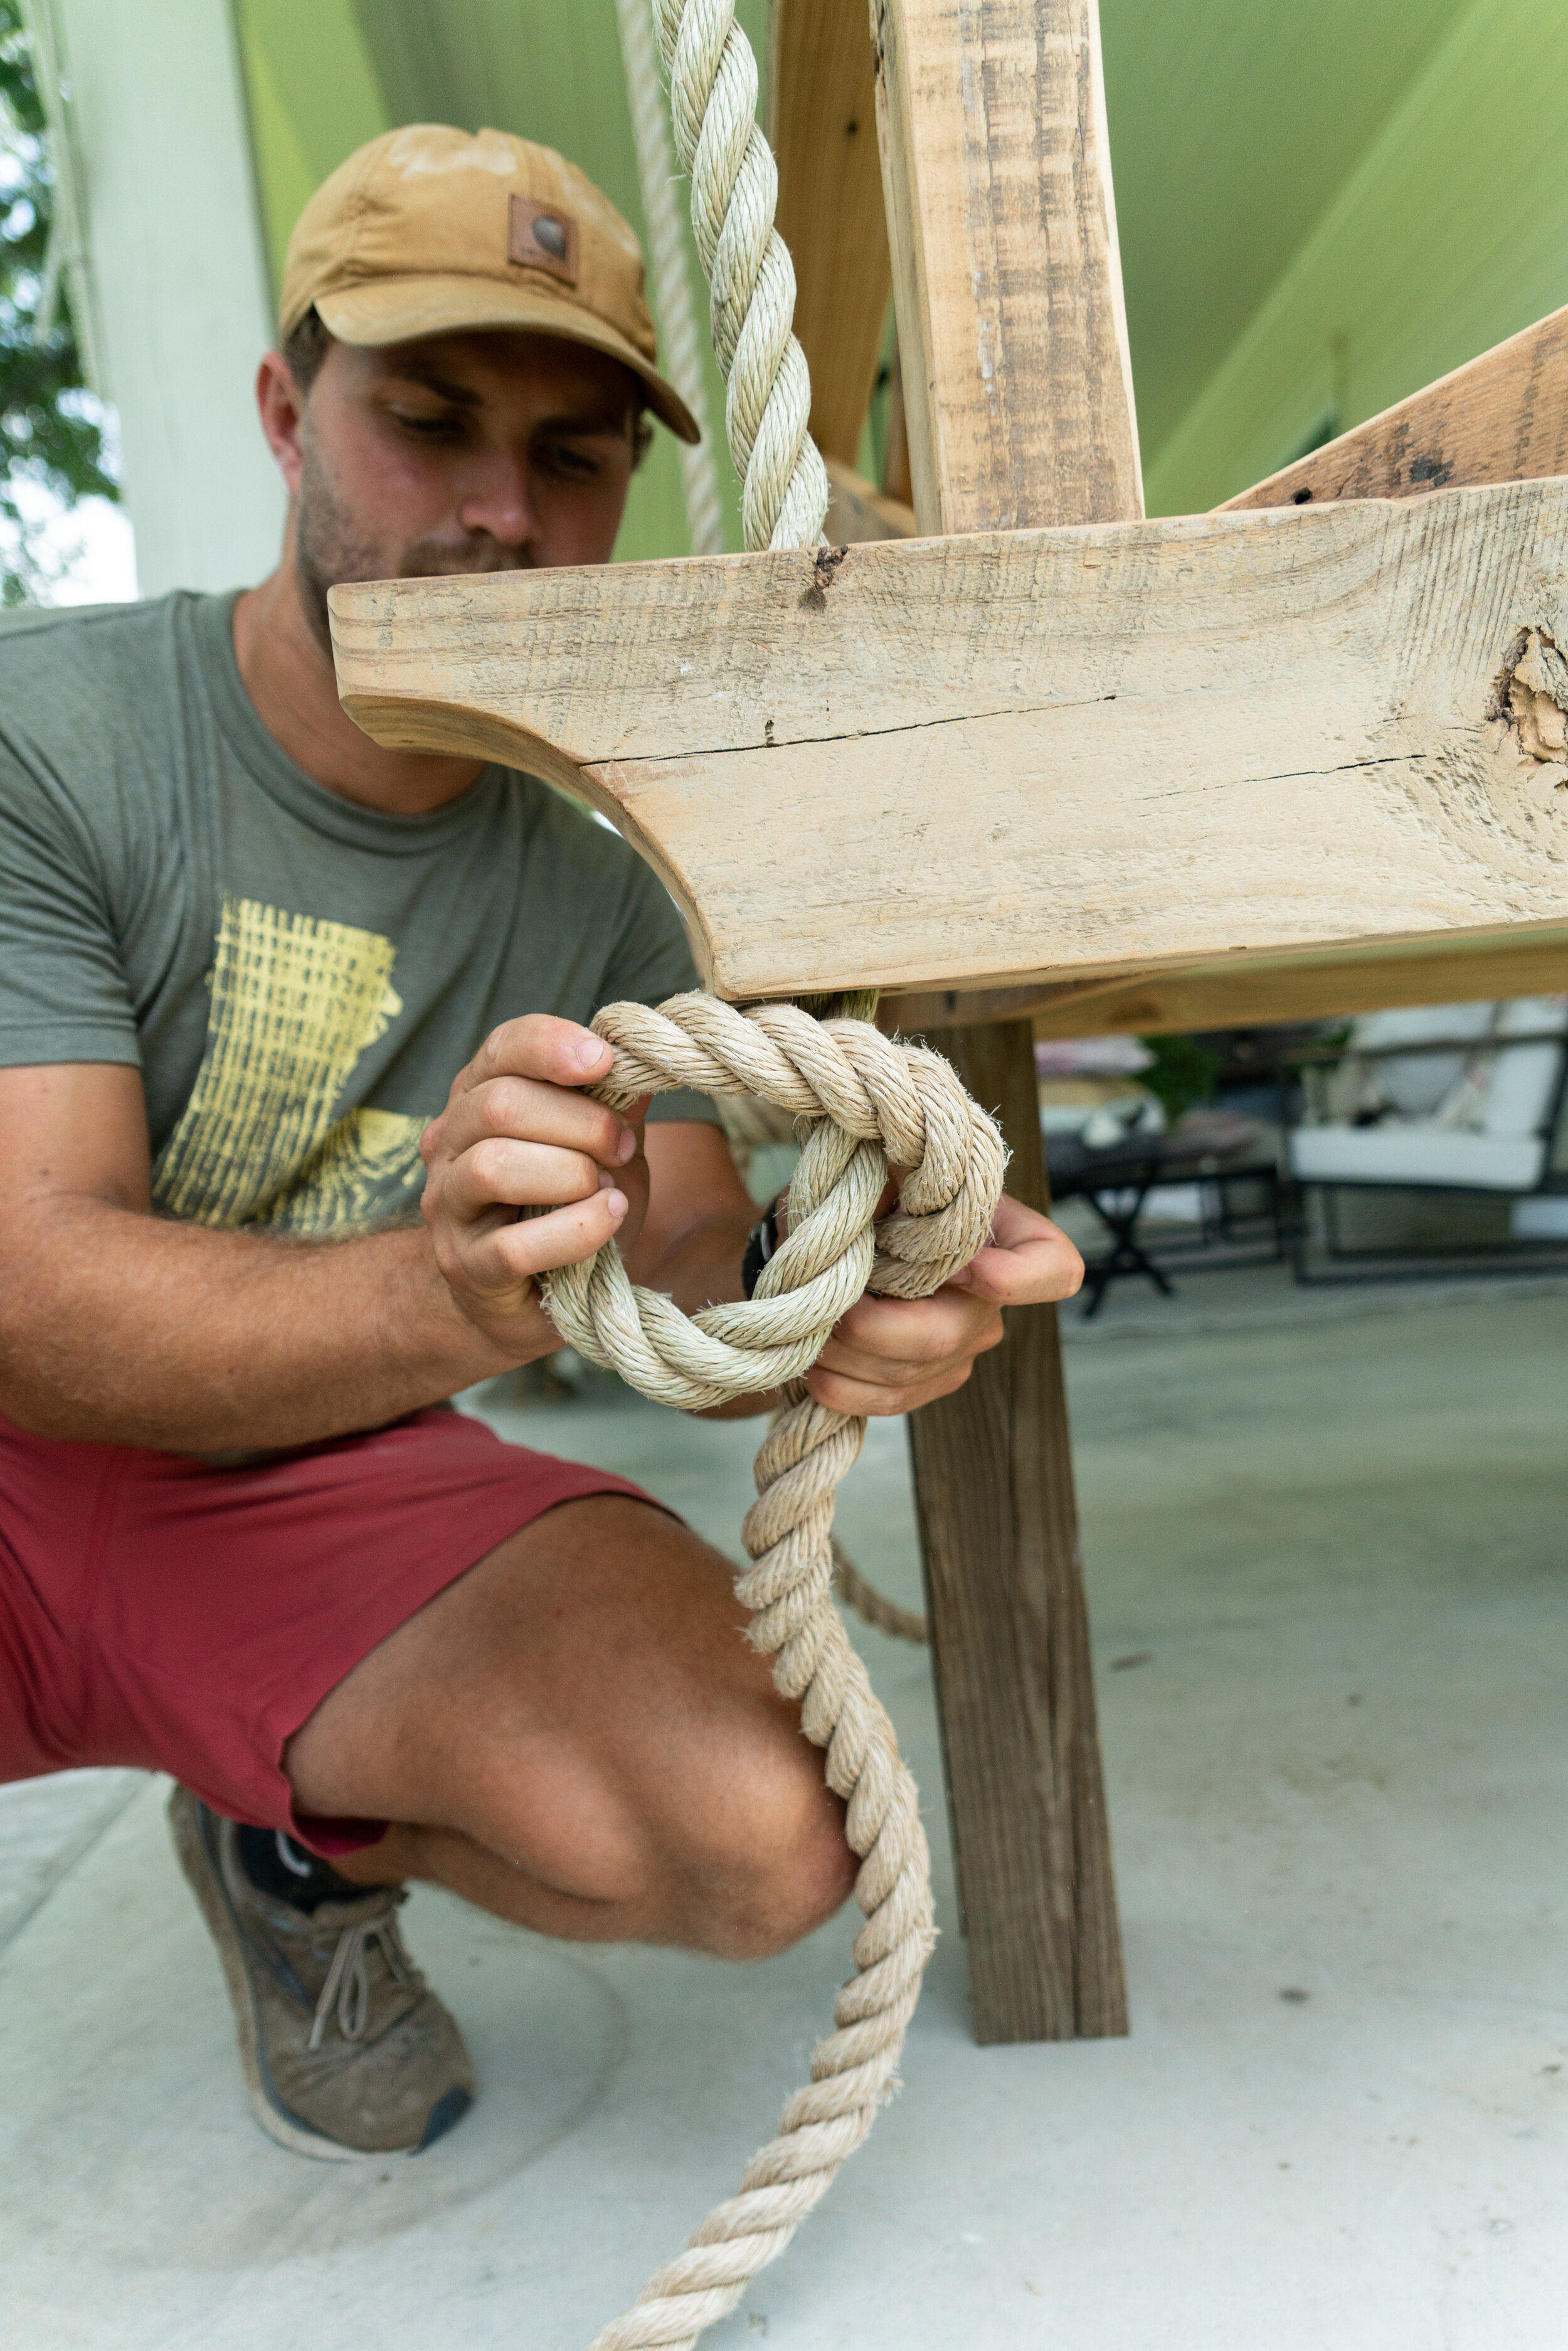
Create a circle with the loose end

Thread the loose end through the circle

Pull tight and scoot the knot up as close to the beam as possible
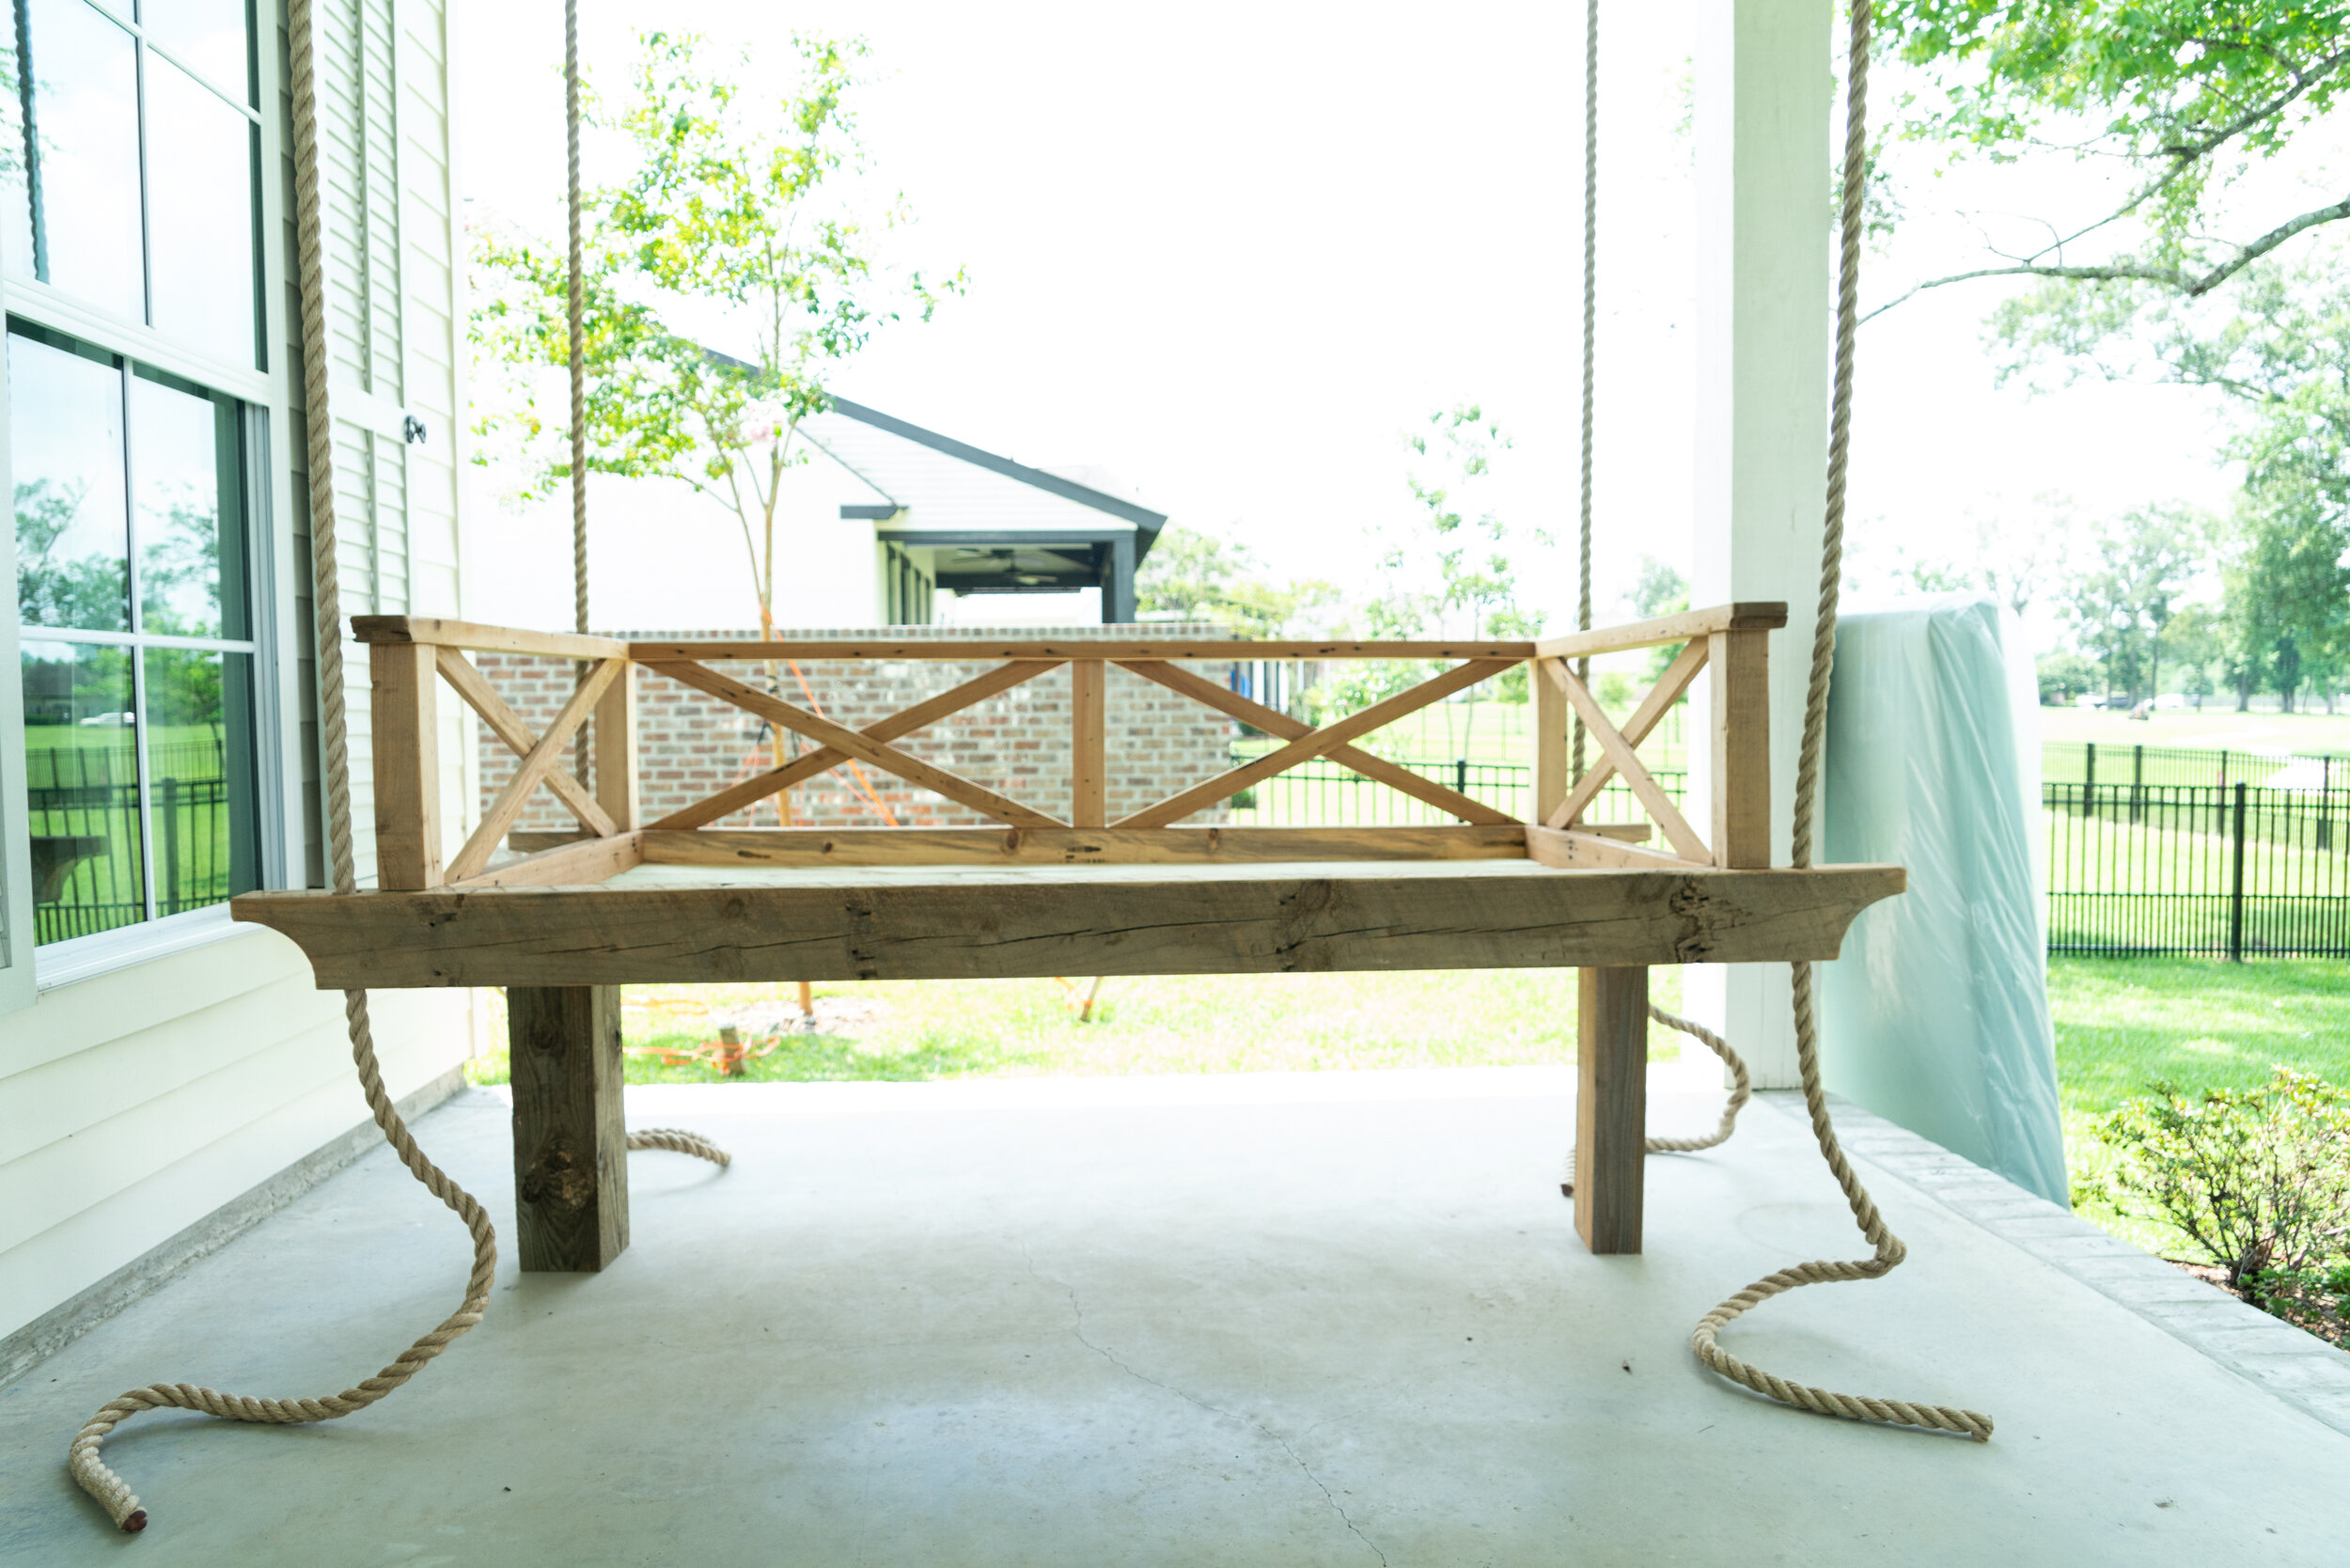
STEP 5: PUT WEIGHT ON THE SWING TO SET IT IN POSITION
Once you have your knots tied, you can then remove the blocks and put weight on both sides of the swing. Rather than immediately sitting on the swing, push down on each end to level the bed and to get rid of any slack that may be let in the knot.
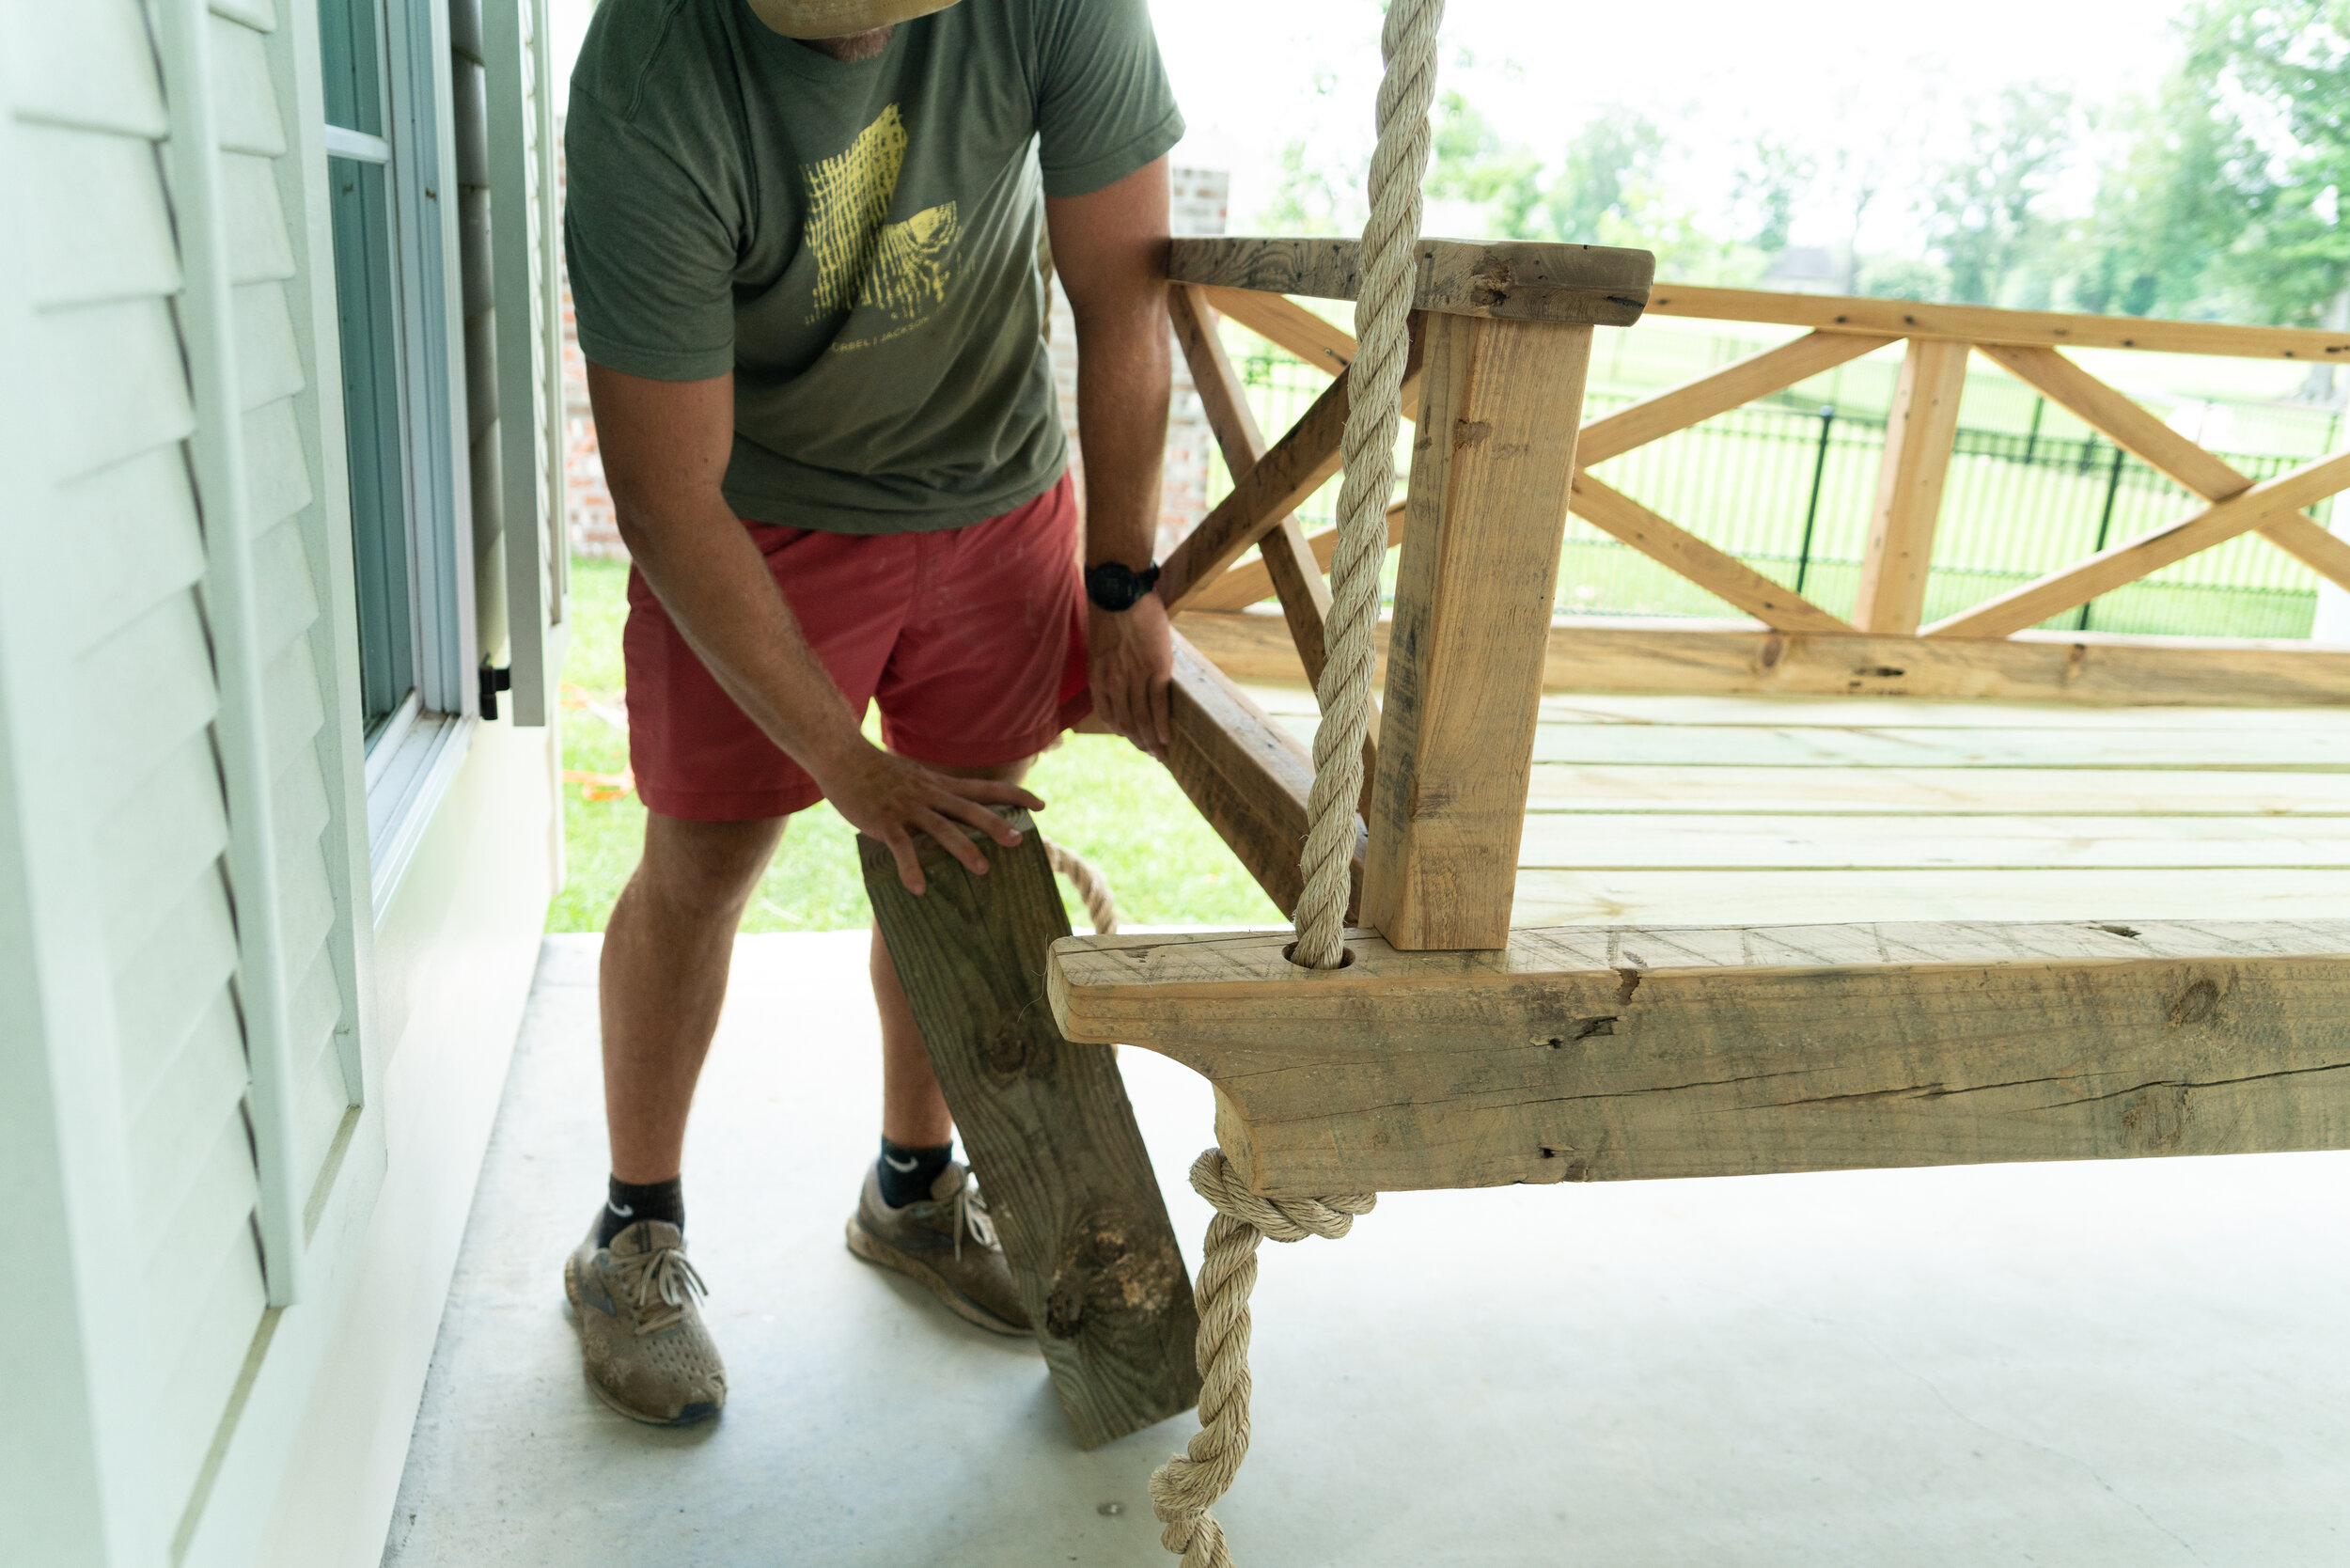
Remove the blocks from under the swing.
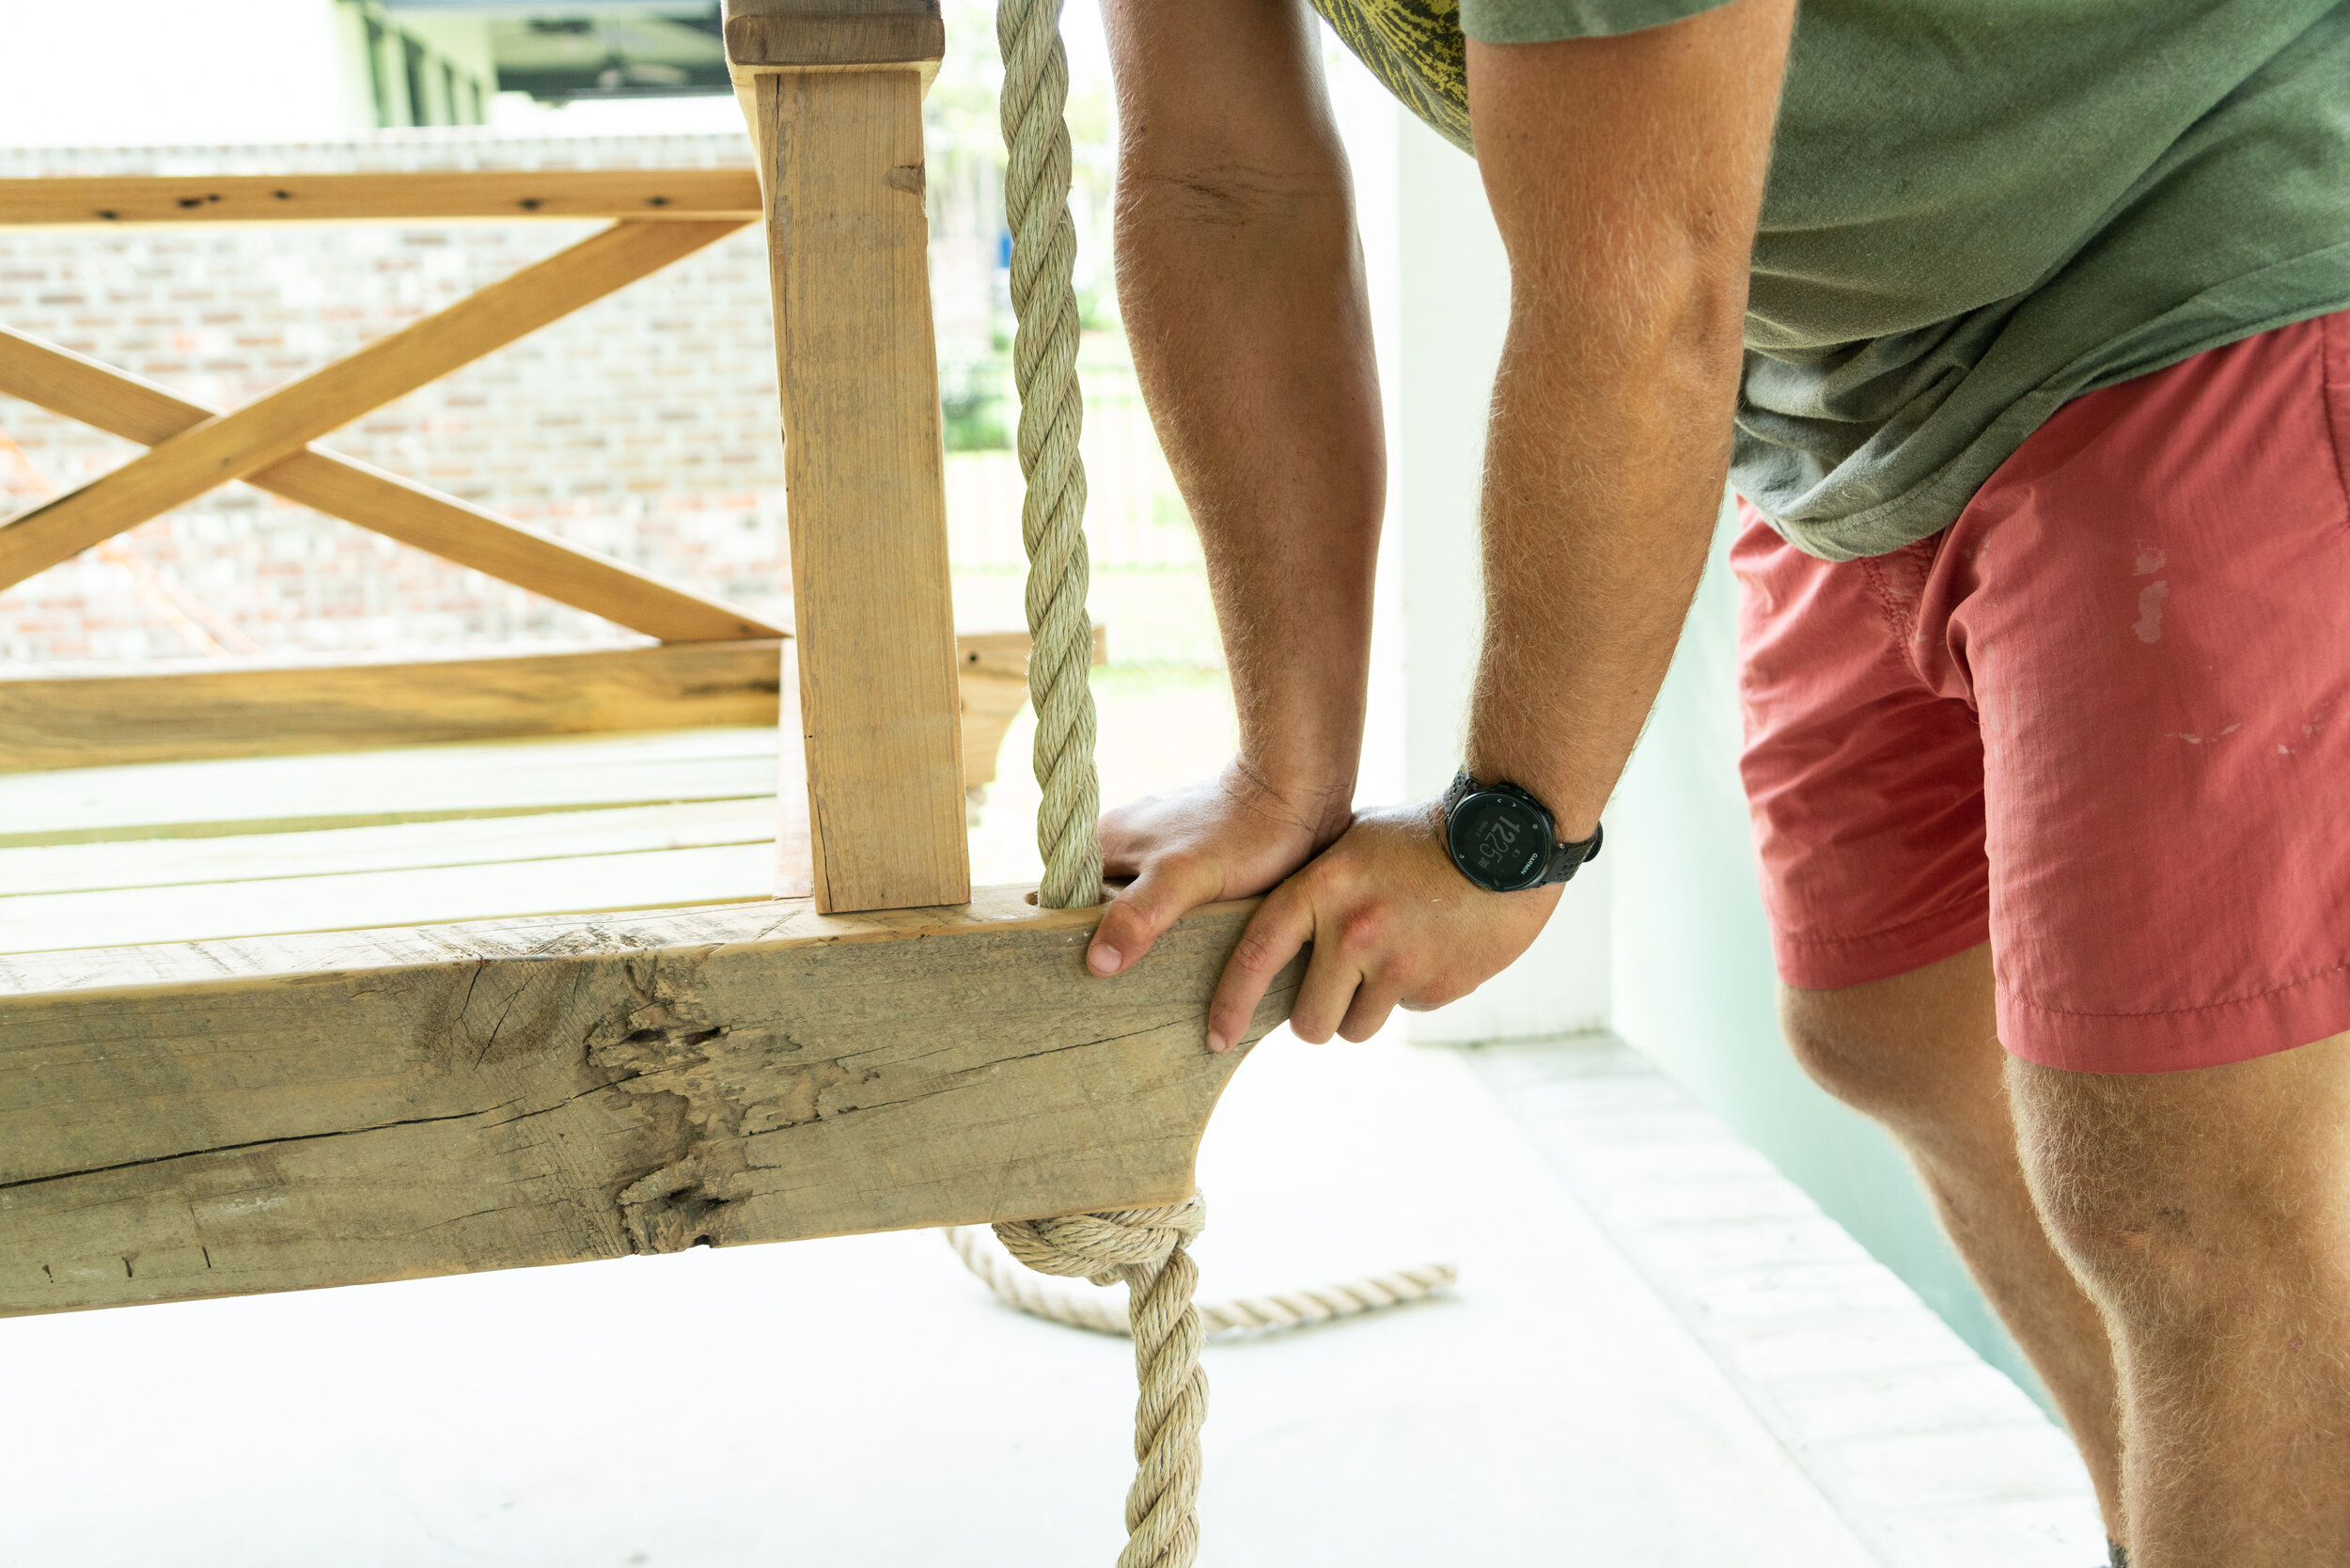
Push down on each end of the beam to level the swing and to get rid of any slack left in the rope.
STEP 6: ENJOY YOUR SWING
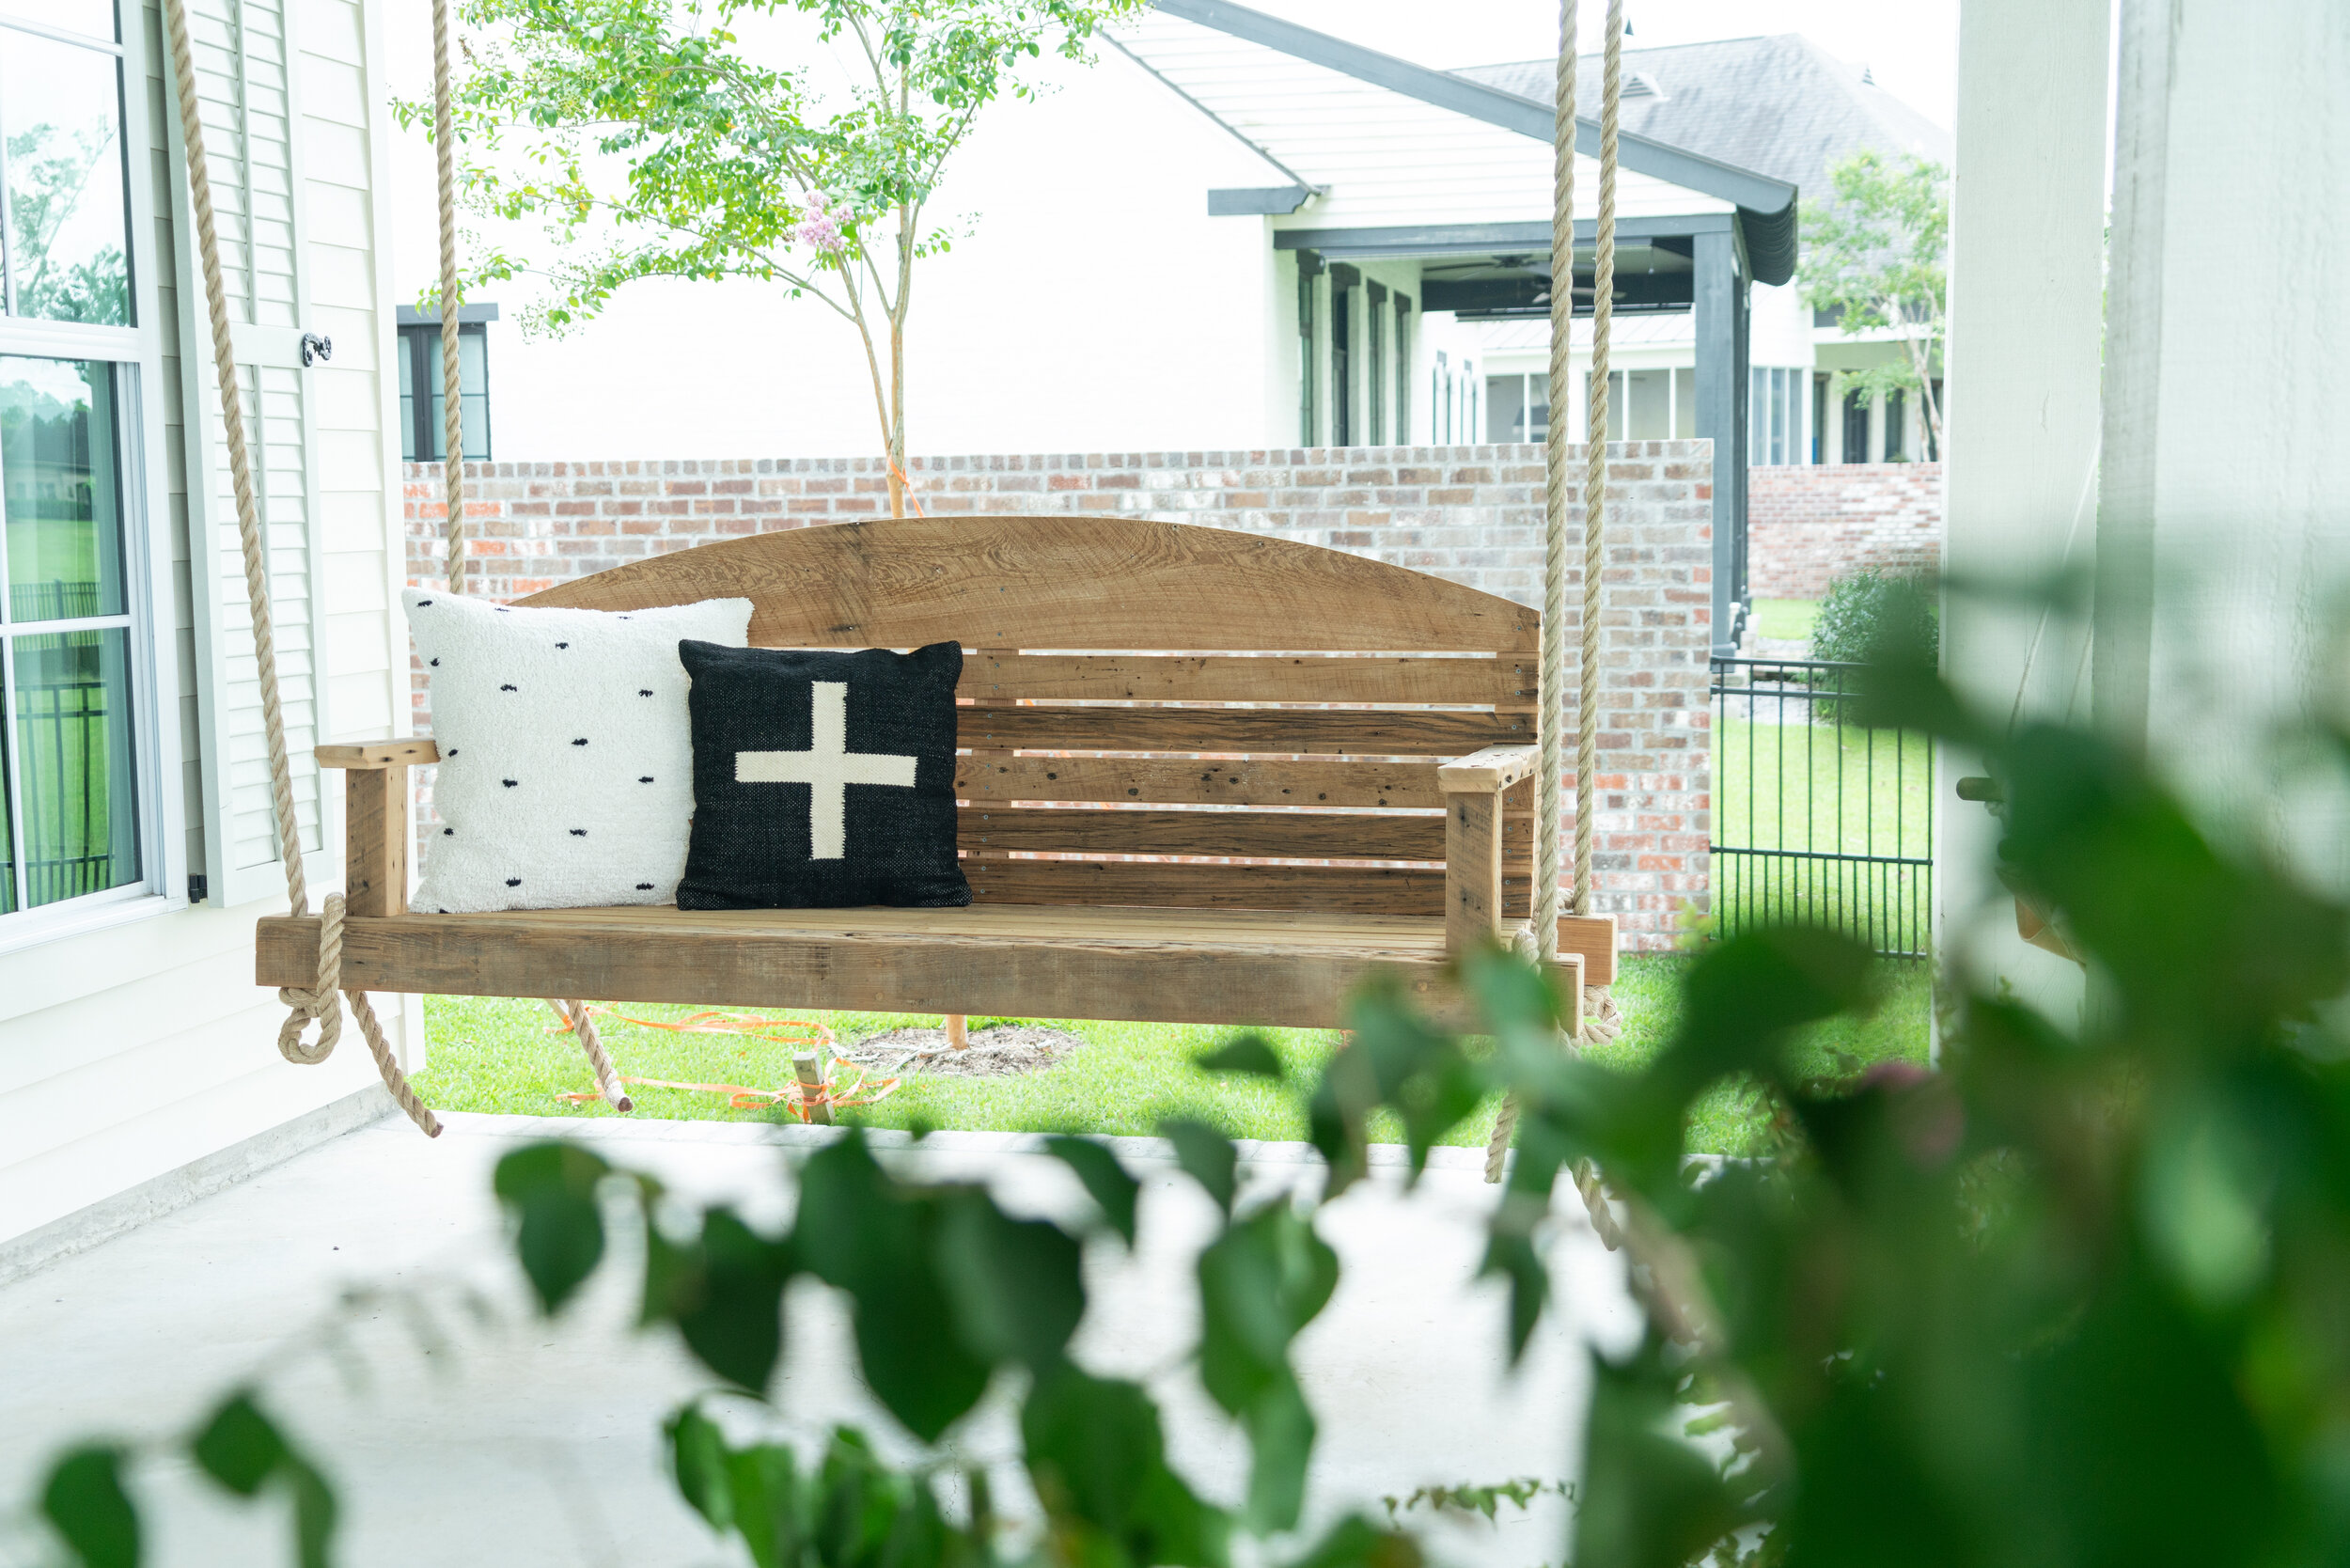
The last thing left to do after all of the hard work is done: ENJOY IT! The best thing about having a porch swing is being able to enjoy the fresh air and relax in the shade of your back porch or giant oak tree!
We love creating swings for our customers that are going to last a lifetime and create memories along the way! If you are interested in having a handmade bed swing by one of our carpenters or have any questions about our swings, please reach out to us!